
Best Coffee Grinders for Beginners
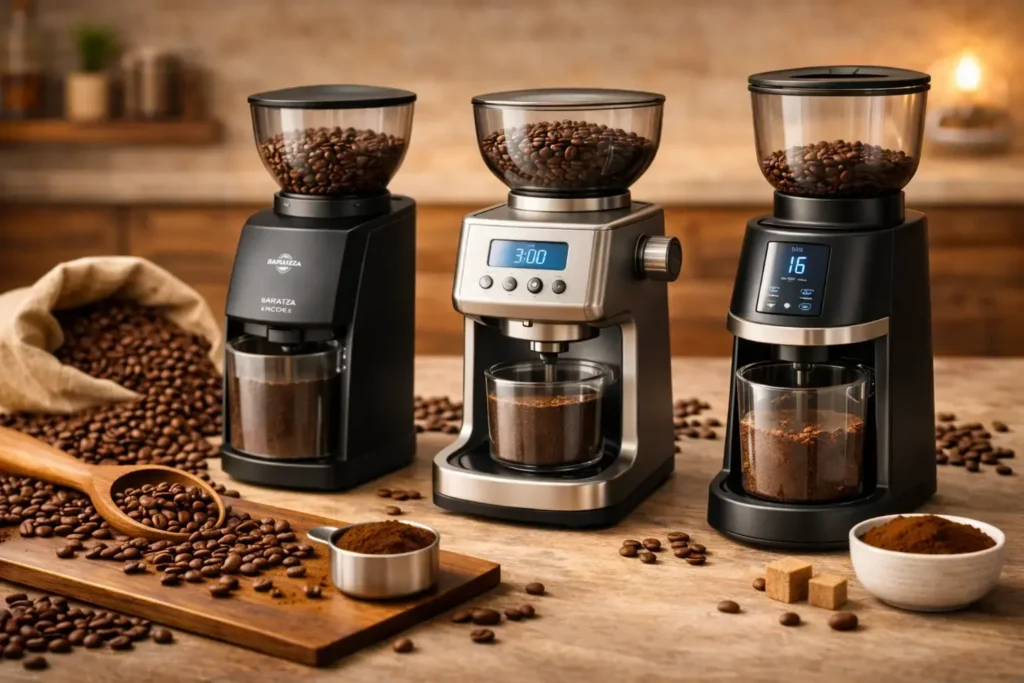
Editorial standards: recommendations are based on current manufacturer specifications, published documentation, brewing workflow, adjustment design, serviceability, and product limitations. CoffeeGearHub does not claim hands-on testing where it has not occurred.
At a glance
What this buying guide covers
This guide compares beginner-friendly burr grinders by ease of adjustment, repeatability, manual-versus-electric workflow, serviceability, brew-method range, and the practical trade-offs that matter in a first grinder.
Editorial analysis
Choose convenience or manual control first
The Baratza Encore is the straightforward serviceable electric route, OXO offers a simpler lower-cost electric workflow, and the KINGrinder K6 is compelling when manual grinding, portability, and fine adjustment matter more than motorized convenience. Virtuoso+ is better treated as a step-up workflow than a necessary first purchase.
The 30-Second Answer
For most beginners who want an electric grinder, the Baratza Encore is the easiest long-term starting point because it combines 40 settings with a serviceable parts ecosystem. Choose the OXO Brew if you want a simpler lower-cost electric workflow. Choose the KINGrinder K6 if you are comfortable hand grinding and value portability plus fine external adjustment.
Why Your Grinder Matters More Than Your Coffee Maker
Most beginners start their home coffee journey the same way: they buy a better coffee maker and keep using pre-ground coffee or a blade grinder. The result is reliably disappointing — a marginal improvement at best, and persistent frustration at worst. The machine is not the limiting variable. The grinder is.
The reason is extraction physics. Every cup of coffee is the result of water dissolving soluble compounds from ground coffee particles at different rates depending on particle size. Acids extract first and quickly. Sweetness and body extract in the middle phase. Bitter compounds extract last and slowly. The goal of any brew is to stop extraction after the desirable compounds are dissolved and before the undesirable ones dominate. A consistent grind — where all particles are approximately the same size — lets all grounds hit the optimal extraction window at the same time. You can tune your brew time, temperature, and ratio to dial that window in, and once you find it, it repeats reliably. An inconsistent grind — produced by any blade grinder — produces fine particles that over-extract (bitter, harsh) and large chunks that under-extract (sour, weak) simultaneously in the same cup. No adjustment to any other variable can fix both problems at once because they are caused by the same root issue: particle size inconsistency. This is why buying a burr grinder is the single most impactful step a beginner can take — not a better kettle, not a nicer dripper, not a more expensive bag of beans. For a full primer on how brewing variables interact, see our Coffee Brew Ratio Guide.
🔬 The freshness factor: Whole beans begin losing aromatic volatile compounds — the molecules responsible for differentiated coffee flavour — within minutes of grinding. Pre-ground coffee sold in bags has been oxidising since the roastery, typically days to weeks before you brew it. Grinding fresh immediately before brewing is not a specialty coffee preference: it is the fastest per-cup quality improvement available to any beginner at any budget. Even a $40 burr grinder grinding fresh beans immediately before brewing will outperform pre-ground coffee in any machine at any price.
Burr vs Blade: The Only Explanation a Beginner Needs
Before reading any product reviews or comparing any prices, a beginner needs to understand one thing: burr grinders and blade grinders are not different tiers of the same product. They work on fundamentally different mechanical principles and produce fundamentally different results. There is no blade grinder at any price that produces results comparable to a quality burr grinder.
| Burr Grinder | Blade Grinder | |
|---|---|---|
| How it works | Two abrasive surfaces set at a precise distance crush beans to a consistent size — the gap between burrs determines particle size | A spinning blade randomly chops beans — particle size is determined by how long you run it, not by any mechanical precision |
| Particle consistency | Highly consistent — all particles exit at approximately the same size for a given setting | Highly inconsistent — every grind produces a random mix of fine powder and large chunks |
| Cup result | Even extraction — balanced acidity, sweetness, and body; diallable; repeatable every session | Mixed extraction — simultaneously bitter (fines over-extract) and sour (chunks under-extract) in the same cup |
| Fixable by adjusting recipe? | Yes — grind coarser or finer and the cup changes predictably | No — the problem is particle inconsistency; no recipe change addresses two opposite extraction problems at once |
| Beginner verdict | ✓ The only starting point worth considering | ✗ Skip entirely — even the cheapest burr grinder produces better results |
⚠️ Already own a blade grinder? If your coffee currently tastes simultaneously harsh and flat in the same cup — bitter on the tongue but thin and weak in body — that is the blade grinder problem. You cannot fix it by adjusting brew time, dose, temperature, or bean quality. The fix is replacing it with any burr grinder. A $40 entry manual burr grinder will produce a noticeably better cup with the same beans in the same recipe.
What Beginners Should Look for in a Coffee Grinder: 5 Variables That Actually Matter
As a beginner, you do not need the most features, the most settings, or the most advanced burr geometry. You need a grinder that is consistent, adjustable, durable enough to use daily, and simple enough to not get in the way of learning. These five factors separate genuinely good beginner grinders from the rest.
| Factor | Why it matters for beginners | What to look for | What to avoid |
|---|---|---|---|
| Burr size | Larger burrs produce more consistent output, generate less heat, and wear more slowly — all important for daily beginner use | 38mm+ for manual; 40mm+ for electric grinders at beginner price points | Grinders with burr size undisclosed — usually indicates very small burrs |
| Grind adjustment range | More steps means more room to find the right grind for your brew method as a beginner — wider range covers more methods | 40+ settings for electric; 30+ clicks for manual; ability to cover both drip and pour-over | Fewer than 15 settings; large jumps between adjacent settings |
| Ease of use | A grinder that is difficult to adjust or read will slow down the beginner learning curve significantly | Clear setting markings; consistent tactile click feedback; simple on/off operation | Stepless adjustment without clear reference markings — difficult for beginners to reproduce settings |
| Build quality | A beginner grinder used daily must handle repetitive stress — cheap motors and plastic burr carriers fail quickly | Metal burr carrier; solid housing; brand with available replacement parts | All-plastic burr carrier; no-brand imports with no spare parts available |
| Beginner-appropriate price | The $80–$180 range covers all genuine quality beginner options; outside this range means either too cheap (poor burrs) or paying for precision you won’t use yet | $80–$100 manual; $60–$90 budget electric; $150–$180 buy-once electric | Under $40 electric burr — burrs and motor are too small for consistent daily output at that price |
How Much Should a Beginner Spend on a Coffee Grinder?
This is the question every new buyer asks first, and it has a clear answer: the quality threshold for a beginner burr grinder starts around $60–$80 for electric and $80–$100 for manual. Below these thresholds, burr size and motor quality fall to the point where consistency is noticeably compromised. Above the $180 mark at the beginner stage, you are paying for grind precision — sub-100-micron particle uniformity, stepless adjustment, commercial-grade burrs — that most beginners cannot distinguish in the cup and cannot use effectively without several months of experience first.
| Buying tier | What to prioritize | Example in this guide | Best for |
|---|---|---|---|
| Avoid blade-grinder tier | Save for a true burr grinder rather than paying for inconsistent chopping | — | Anyone starting from scratch |
| Lower-cost electric | Simple controls, genuine burrs, enough range for everyday filter coffee | OXO Brew Conical Burr Grinder | Budget-conscious beginners |
| Manual value | Fine adjustment, portability, quiet operation | KINGrinder K6 | 1–2 cup brewers and small kitchens |
| Serviceable electric | Parts availability, repeatable settings, convenient daily workflow | Baratza Encore | Most electric-grinder beginners |
| Step-up electric | More repeatable dose control and a refined workflow | Baratza Virtuoso+ | Brewers whose routine has become more demanding |
Beginner Grinder Type: Quick-Comparison by Use Case
| Best for | Recommended grinder | Why it works | Main trade-off |
|---|---|---|---|
| First electric grinder for daily filter coffee | Baratza Encore | 40 settings, simple controls, repairable platform | Permanent counter footprint |
| Lower-cost electric start | OXO Brew Conical Burr | One-touch timer, 15 settings plus microsettings | Less adjustment range than step-up grinders |
| Small kitchen or quiet apartment | KINGrinder K6 | Compact, quiet, external adjustment, no outlet required | Manual effort per dose |
| Travel or camping | KINGrinder K6 | Portable and covers a broad grind range | Manual grinding |
| Repeatable dose-by-time electric workflow | Baratza Virtuoso+ | 0.1-second digital timer and serviceable Baratza platform | Higher cost than entry electric grinders |
Compare current options
Electric convenience vs manual control
These two picks show the most useful beginner split: an electric grinder designed for repeatable countertop use versus a manual grinder with precise external adjustment and no motor.
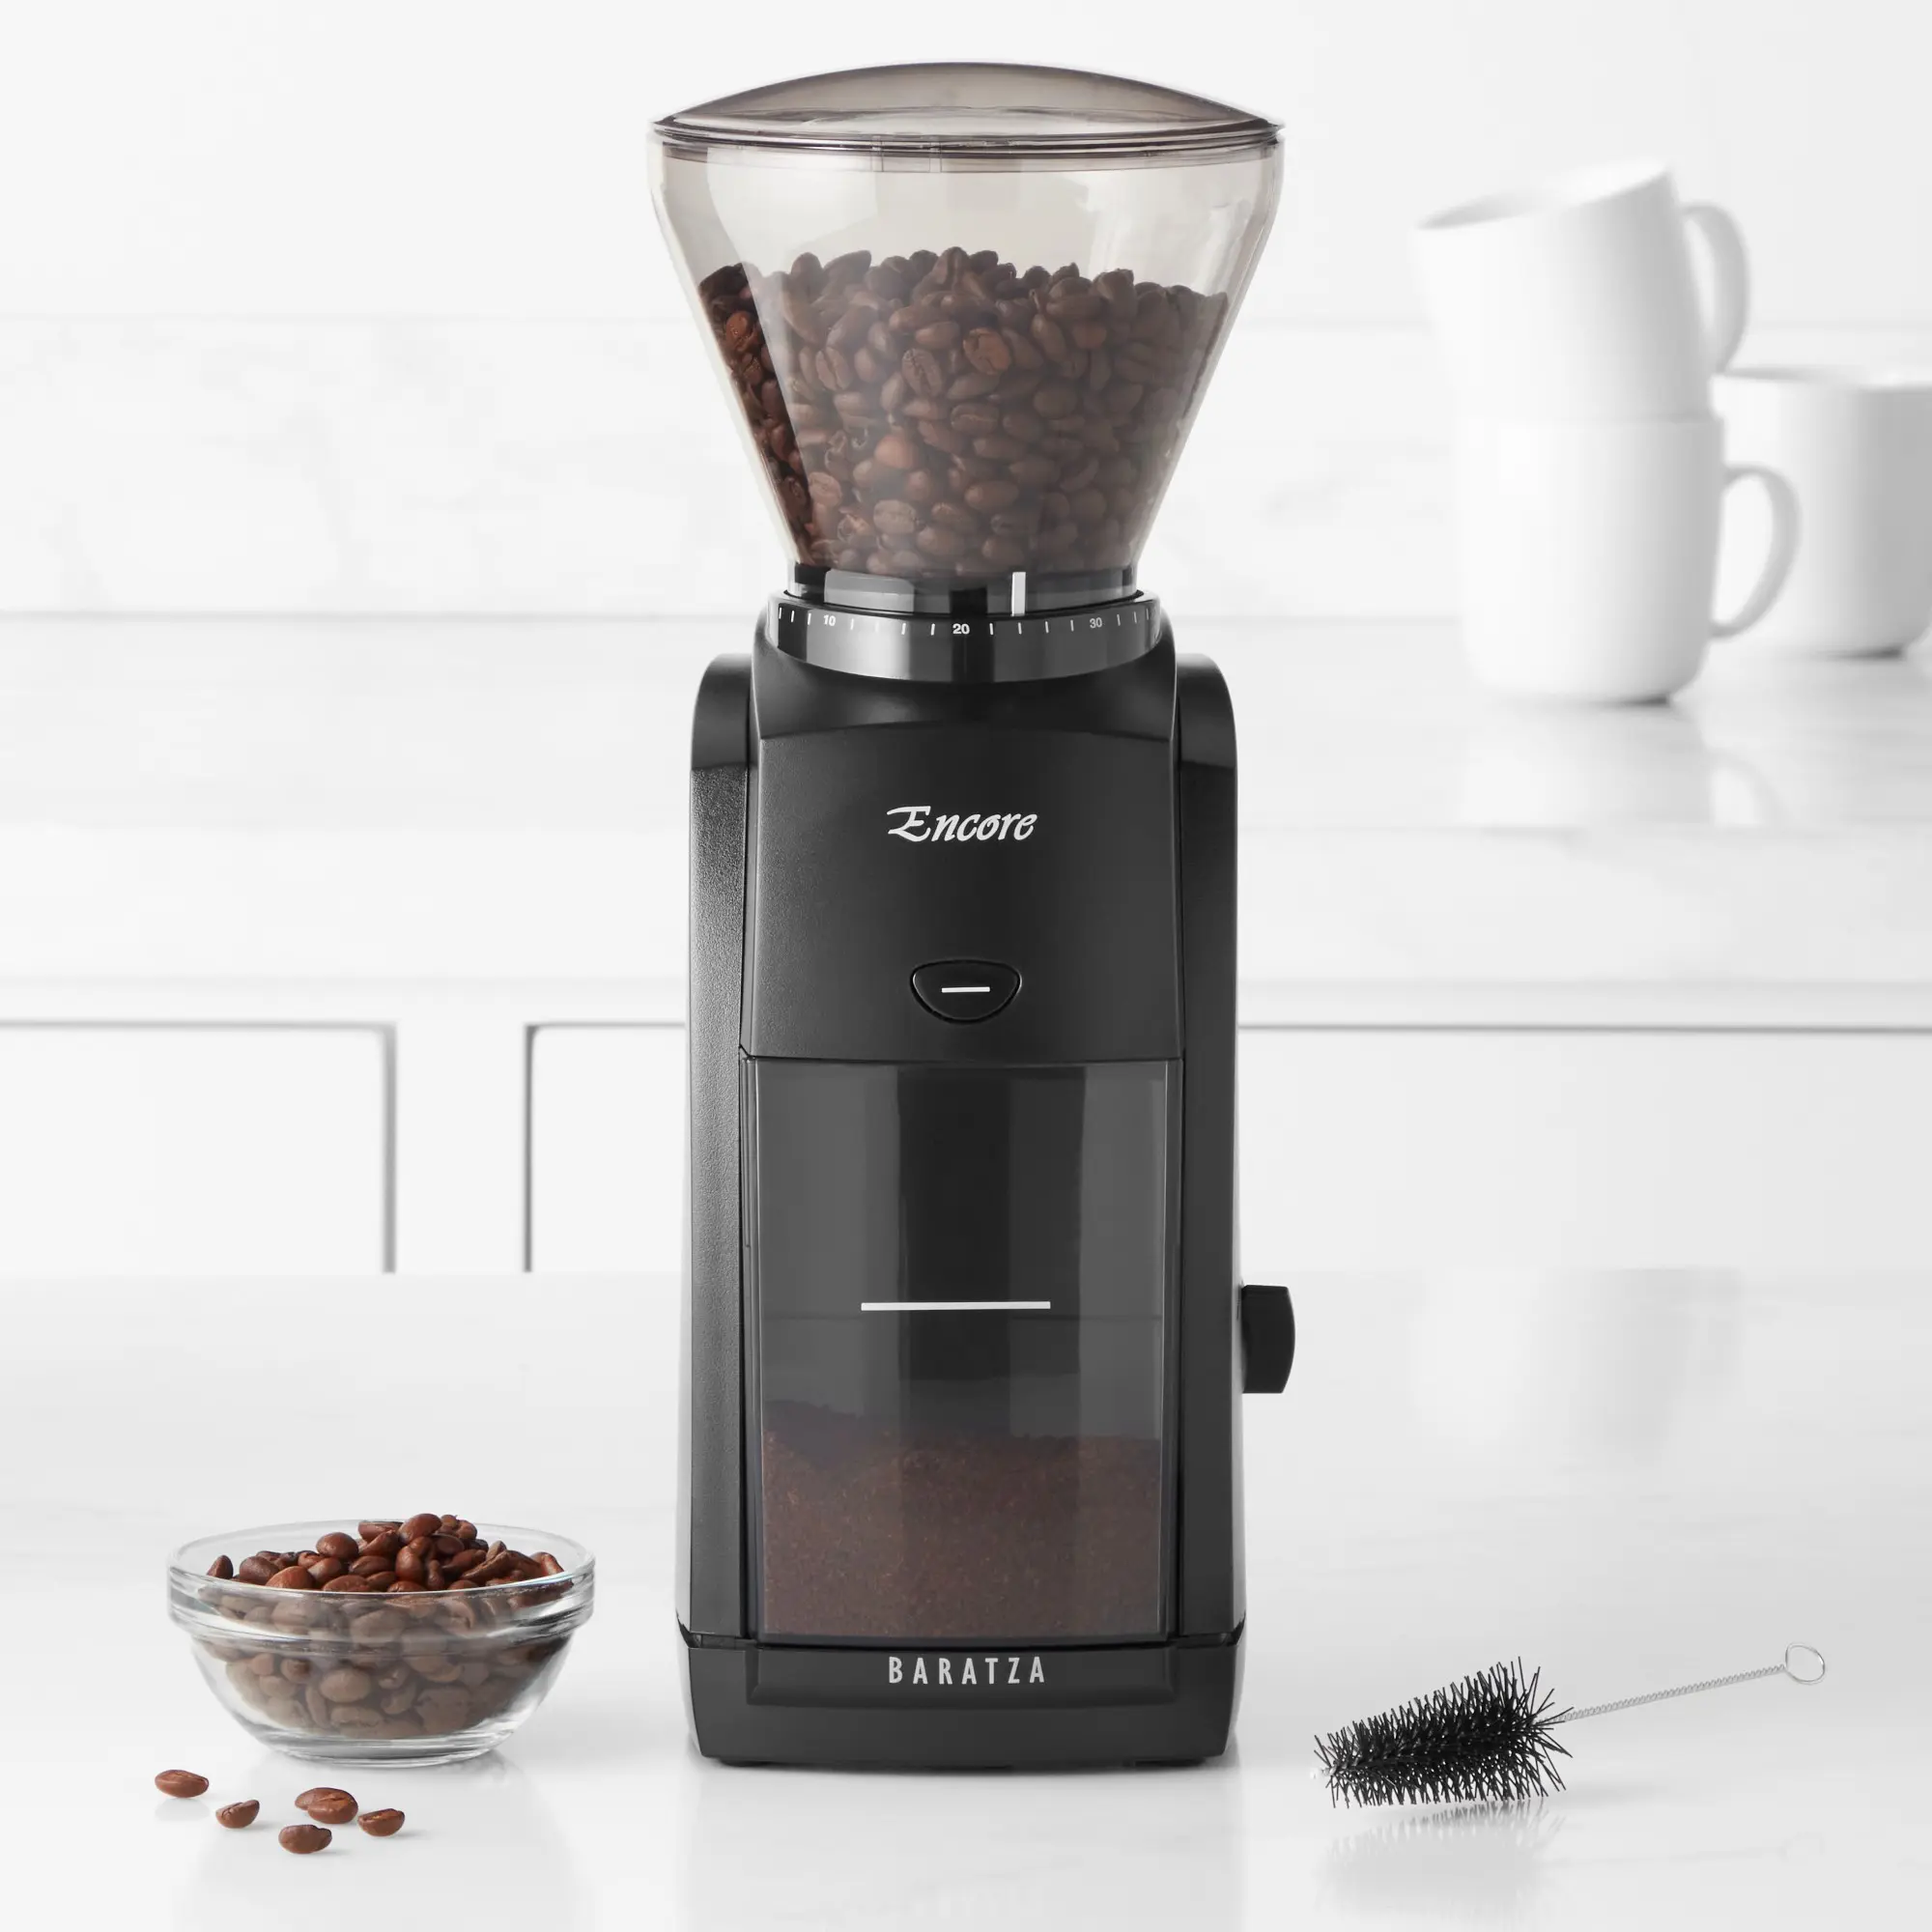 Baratza EncoreServiceable electric burr grinder with 40 settings and a simple home workflow.Check current Amazon offer →
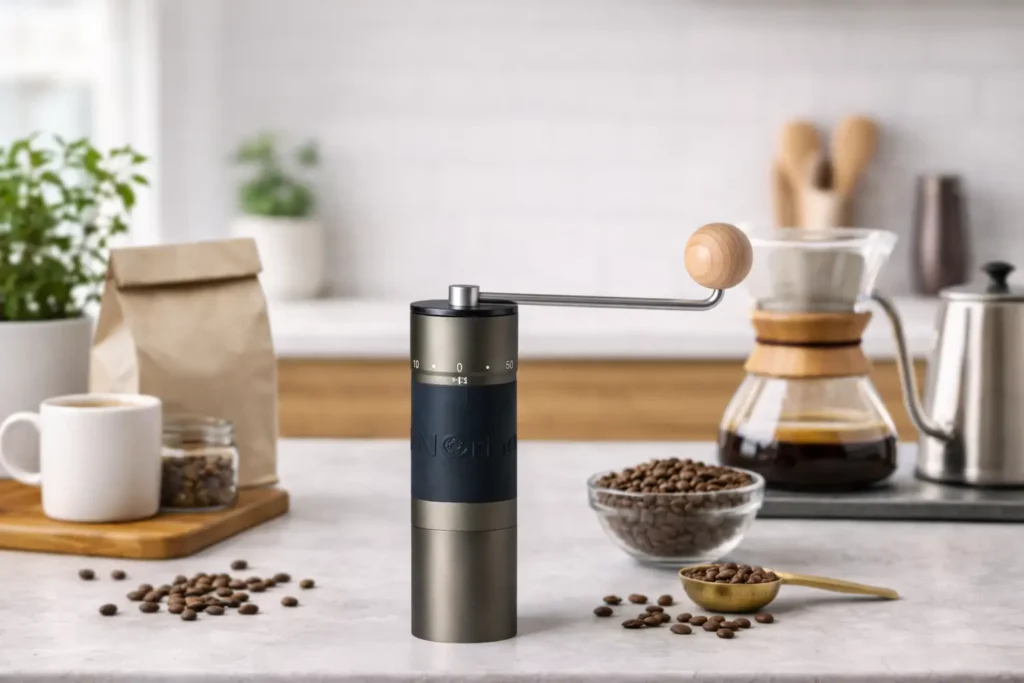 KINGrinder K6Manual grinder with a 48mm heptagonal stainless-steel burr and external click adjustment.Check current Amazon offer →
Affiliate disclosure: These Amazon links may earn CoffeeGearHub a commission at no additional cost to you. Prices and availability can change.
Best Coffee Grinders for Beginners: Our Top Picks
These four picks represent the best beginner grinder at each use case and price point — verified by consistent community endorsement, grind consistency data, and alignment with how each is actually used by beginners in real daily brewing. All affiliate links use the CoffeeGearHub Amazon Associates tag.
Best Overall: Baratza Encore
The Baratza Encore has been the most consistently recommended first electric burr grinder in the specialty coffee community for over a decade — and for good reason. The hopper-mounted grind adjustment gives beginners a simple, tactile interface with 40 clearly marked settings. Its 40mm M3 conical steel burr is designed for repeatable home filter grinding. The grind range covers drip, pour-over, French press, and AeroPress from a single unit without any settings feeling cramped together. Most importantly for a beginner: Baratza sells replacement burrs, motors, and hoppers directly, which means this is a grinder you maintain rather than discard when something eventually wears. For beginners who want a repairable electric grinder with a long parts-support history, it is a strong starting point.
- Burr type: 40mm M3 conical steel burr
- Settings: 40 numbered grind settings for filter-focused home brewing
- Beginner-friendly features: Hopper adjustment, front pulse button, DC motor, and a 300g hopper
- Brew method coverage: Filter coffee methods including drip, pour-over, AeroPress, and French press; dial in by recipe and taste rather than treating one numbered setting as universal
- Best for: any beginner who wants to buy once and not revisit the grinder decision for years
Disclosure: CoffeeGearHub may earn from qualifying purchases.
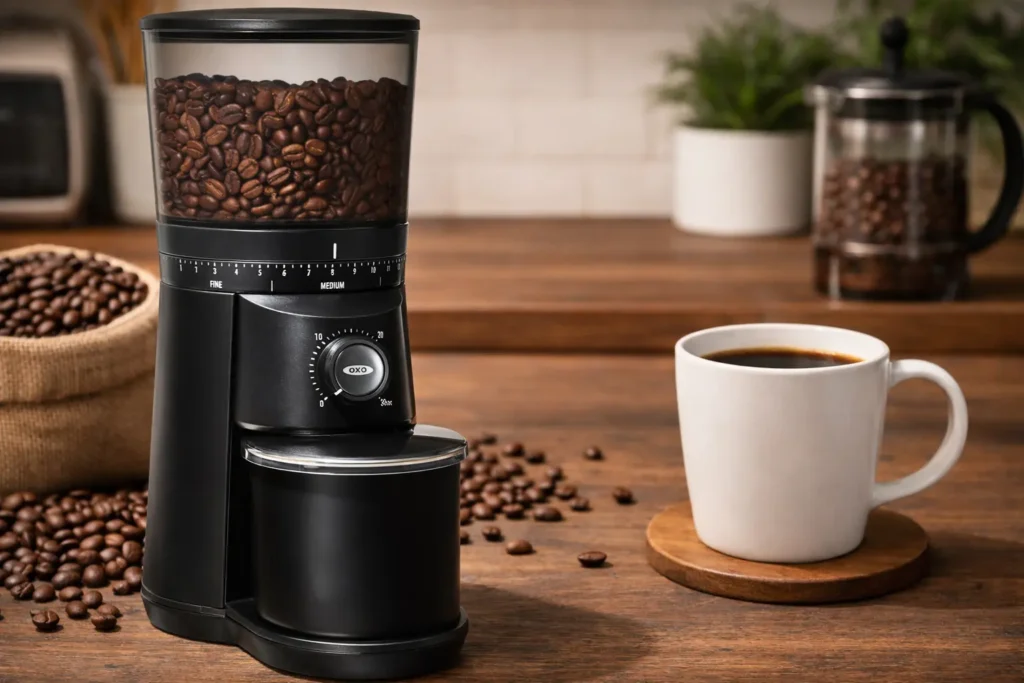
Best Budget Electric: OXO Brew Conical Burr Grinder
The OXO Brew Conical Burr Grinder is designed around simplicity and is the most beginner-friendly electric burr grinder at its price point. The one-touch timer dosing system removes the need to weigh every dose, the 15 main grind settings plus microsettings cover fine through coarse home brewing, and the conical stainless burrs produce output that is a clear, immediate improvement over any blade grinder. The OXO’s limitations are real — 15 settings is limiting once you start dialling in V60 or Chemex, and replacement parts are not as accessible as Baratza — but as a lower-cost first step into burr grinding, it remains a practical recommendation. Its simpler adjustment range is the main reason an enthusiast might later move to a more precise grinder.
- Burr type: Conical stainless steel burrs
- Settings: 15 main settings plus microsettings
- Beginner-friendly features: One-touch timer that remembers the last setting, a clear grind dial, and a 12 oz hopper
- Brew method coverage: OXO groups 1–5 as fine, 6–10 as medium for pour-over/drip, and 11–15 as coarse for French press/cold brew
- Best for: budget-constrained beginners; anyone who wants zero guesswork in their first grinder
Disclosure: CoffeeGearHub may earn from qualifying purchases.
Best Manual: KINGrinder K6
The KINGrinder K6 is a strong manual option for beginners who value portability, quiet operation, and fine adjustment control. KINGrinder specifies a 48mm heptagonal stainless-steel burr, external adjustment with 60 clicks per rotation, and 16μm movement per click. That wide range covers espresso through coarse brewing, so the same grinder can follow a beginner as brewing interests change.
- Burr type: 48mm heptagonal stainless-steel burr
- Settings: external adjustment system — the most precise grind adjustment available to a beginner at this price
- Beginner-friendly features: External click adjustment, no electricity required, compact storage, and quiet operation
- Brew method coverage: Espresso through coarse brewing — see the current K6 reference ranges below
- Best for: beginners in small kitchens or apartments; anyone wanting best grind quality per dollar
Disclosure: CoffeeGearHub may earn from qualifying purchases.
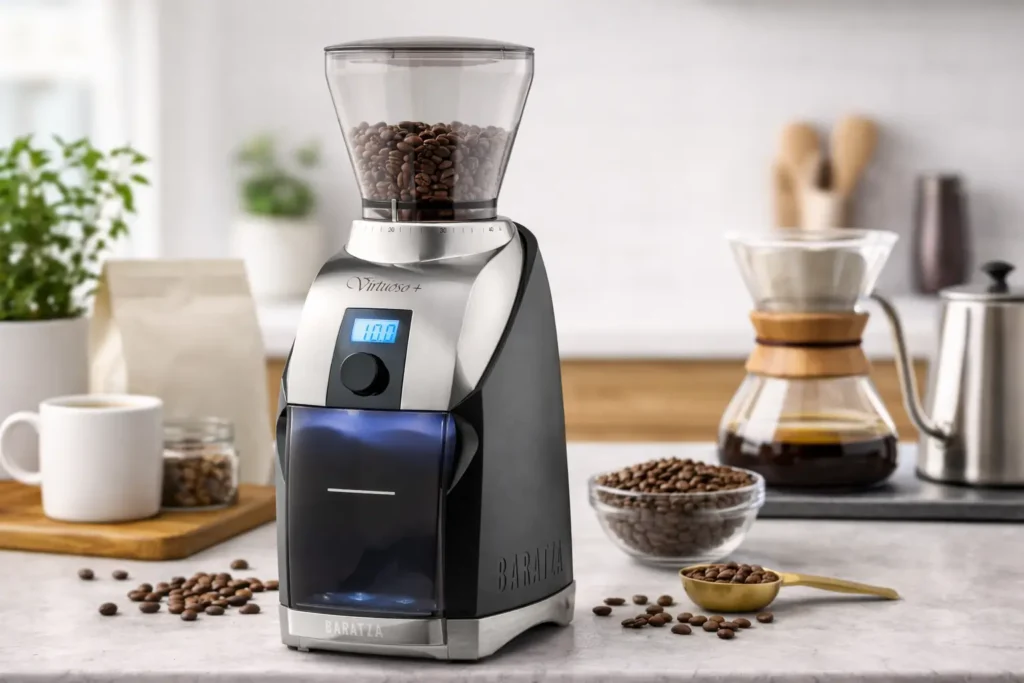
Best Step-Up: Baratza Virtuoso+
The Baratza Virtuoso+ is a step-up electric option for beginners who want more repeatable dose-by-time workflow. Baratza pairs its 40mm M2 conical steel burr with a digital timer adjustable in 0.1-second increments. It is not required for a first grinder, but the timer and serviceable Baratza platform make it useful when repeatability and workflow matter more.
- Burr type: 40mm M2 conical steel burr
- Dose control: Digital timer adjustable in 0.1-second increments
- Beginner-relevant features: Repeatable digital dose timer and Baratza parts/support ecosystem
- Best for: Encore graduates; beginners who develop a serious interest in V60 or Chemex as their brewing becomes more demanding
Disclosure: CoffeeGearHub may earn from qualifying purchases.
Manual vs Electric: Which Should a Beginner Buy?
This is the second most common question after burr vs blade, and unlike burr vs blade it genuinely depends on your situation. Neither manual nor electric is universally better for beginners. The right answer depends on how much you brew, where you live, and what matters most to your morning routine.
| Factor | Manual burr grinder (K6) | Electric burr grinder (Baratza Encore) |
|---|---|---|
| Daily effort | Requires hand grinding for every dose | Motor handles the grinding |
| Multiple cups | More effort as dose size rises | More convenient for larger household doses |
| Counter space | Easy to store in a drawer or cabinet | Uses permanent counter space |
| Noise | Quiet because there is no motor | Motor noise is part of the workflow |
| Portability | Excellent; no outlet required | Designed mainly for countertop use |
| Adjustment | External click dial; easy to record settings | Numbered hopper adjustment; easy to return to settings |
| Best beginner scenario | 1–2 cups, small kitchen, travel, quiet mornings | Frequent brewing, multiple users, convenience priority |
Beginner Grind Size Guide: What Each Brew Method Requires
Every brew method requires a different grind size because every method extracts coffee at a different rate. Beginners are often surprised to find that the same beans in the same grinder can produce entirely different cups just by changing the grind setting. This is not a flaw — it is the system working correctly. Use the table below to find your starting point for any brew method. Then use the dial-in guide to refine from there.
| Brew method | Starting grind | Visual reference | If too fine | If too coarse |
|---|---|---|---|---|
| AeroPress | Medium-fine to medium | Fine-to-coarse sand, depending on recipe | Slow press, harsh or bitter cup | Fast drawdown, weak or sour cup |
| V60 / pour-over | Medium-fine | Coarse sand | Stalled drawdown, harshness | Fast drawdown, thin or sour cup |
| Chemex | Medium to medium-coarse | Slightly coarser than many V60 recipes | Very slow drawdown | Fast, weak cup |
| Drip machine | Medium | Coarse sand / granulated sugar | Slow flow, over-extraction | Fast flow, weak extraction |
| French press | Coarse | Coarse sea salt | Muddy cup, difficult plunge | Thin, under-extracted cup |
| Cold brew | Coarse | Coarse, even particles | More bitterness and sediment | Weak concentrate |
Extraction Science: Why Grind Consistency Changes Everything in Your Cup
Understanding the extraction mechanism behind grind consistency is not optional knowledge for beginners — it is the foundation of every adjustment you will make to your brew for as long as you brew coffee. Three principles cover everything you need to know at this stage.
- Particle size determines extraction rate, and extraction rate determines what your cup tastes like. Coffee contains hundreds of soluble compounds — acids, sugars, oils, and bitter phenolics — that dissolve in water at different rates. Acids and bright notes extract first (quickly), sweetness and body extract in the middle phase, and bitter compounds extract last (slowly). The goal of every brew is to stop extraction in the middle zone — after the desirables are dissolved but before the undesirables dominate. A consistent grind lets all particles hit this window at the same time. An inconsistent grind — from any blade grinder — means fine particles overshoot the window (over-extracted, bitter) while large particles never reach it (under-extracted, sour) simultaneously in the same cup. This is why no recipe adjustment can fix a blade grinder problem: you are fighting two opposite extraction issues at once.
- Fines are the hidden variable in grind quality that most beginners don’t know about. Every burr grinder produces some ultra-fine particles as a grinding by-product. These fines extract almost instantly, contributing bitterness and muddiness before the main particles have even reached their optimal point. The quantity of fines varies significantly between grinders: small, cheap burrs produce more; large, quality burrs produce fewer. This is why the KINGrinder K6’s 48mm burrs produce a cleaner, less muddy cup than cheaper manual grinders with 38mm burrs — and it is why burr size is a meaningful specification, not marketing. For a deeper dive into grind consistency and particle distribution, see our Burr vs Blade Grinders guide.
- Freshness is the third variable beginners underestimate. Coffee begins losing aromatic volatile compounds within minutes of grinding. These volatiles are responsible for the differentiated flavours — fruit, floral, chocolate, caramel — that make specialty coffee worth buying. Pre-ground coffee in bags has been oxidising for days to weeks before you brew it. Grinding immediately before brewing preserves the full aromatic profile. This is not an advanced technique or a specialty preference: it is the most impactful quality improvement a beginner can make, and a burr grinder is what makes it practical at every morning brewing session.
KINGrinder K6 Grind Settings: Beginner Reference Table by Brew Method
KINGrinder specifies the K6 at 60 clicks per rotation with 16μm movement per click. The manufacturer’s grind-size chart is the safest starting reference; record your setting, brew once, taste, and change one variable at a time.
| K6 reference range | Clicks from zero | How to use it |
|---|---|---|
| Extra fine | 15–25 | Very fine grinding; use only when the recipe calls for it |
| Fine | 25–60 | Fine brewing range; adjust carefully in small steps |
| Medium-fine | 60–90 | Useful starting zone for many AeroPress and finer pour-over recipes |
| Medium | 90–120 | Useful starting zone for many pour-over and drip recipes |
| Coarse reference | About 150 | Coarser immersion-style starting reference |
Important: KINGrinder’s chart is a reference, not a universal recipe. Dose, roast, brewer geometry, filter, water, and target drawdown can all shift the best setting. Record your result and adjust from there.
Dial-In Guide: How a Beginner Finds Their First Good Grind Setting
Dial-in is the process of finding the grind setting that produces a balanced cup with your specific bean, brew method, and recipe. It is the skill that separates beginners who feel frustrated with their grinder from beginners who feel in control of their cup. The process is methodical, not intuitive, and the most important rule is also the simplest: change one variable at a time.
The Beginner Dial-In Process
- Start at the K6 click number from the table above for your method and roast
- Brew using standard parameters for your method: standard dose, standard temperature, standard pour or steep time
- Taste the cup. Identify the primary off-note: sour/thin OR bitter/harsh — pick the dominant one
- Adjust grind only: 3–5 clicks finer for sour; 3–5 clicks coarser for bitter
- Re-brew at the new setting, everything else identical
- Repeat until the cup is balanced — no dominant sour or bitter note
- Only then: adjust dose for strength or temperature for body/brightness
Taste → What to Adjust
- Sour / sharp / watery body: grind 3–5 clicks finer → re-brew
- Bitter / harsh / dry finish: grind 3–5 clicks coarser → re-brew
- Still sour after grind adjustment: raise water temp 2°C; extend brew time 15s
- Still bitter after grind adjustment: lower water temp 2°C; shorten brew time 15s
- Balanced but too weak: add 2–3g coffee; keep water volume the same
- Balanced but too strong: reduce 2–3g coffee; keep water volume the same
- No aroma at any setting: buy fresher beans — stale coffee cannot be fixed by grind adjustment
Common Beginner Grinder Mistakes to Avoid
| Mistake | Why beginners make it | What to do instead |
|---|---|---|
| Buying a blade grinder to save money | Blade grinders are cheaper and marketed alongside burr grinders in stores | Save an extra $30–$40 and buy the OXO Brew instead — the cup quality difference is immediate and obvious |
| Buying an espresso-focused grinder first | Espresso sounds impressive as a first home coffee goal | Start with a drip or pour-over setup — espresso requires a dedicated grinder with different precision than a standard burr grinder |
| Changing multiple variables in one brew session | When a cup tastes bad, beginners change grind, dose, temperature, and time simultaneously | Change grind only — taste — then adjust the next variable. One change per brew produces clear, usable information |
| Dosing by scoop rather than weight | Scoops seem simpler than scales | Buy a basic digital kitchen scale — light and dark roasts have different densities; a scoop of each can vary by 20% in actual weight, producing wildly different brew strengths |
| Never cleaning the grinder | Beginners don’t know coffee oil is a maintenance issue | Wipe the grounds bin after every use; do a full brush clean every 2–4 weeks — rancid oil produces a stale flat taste that is easy to mistake for a bean problem |
| Buying pre-ground coffee for a new burr grinder | It seems like a simpler start | Buy whole beans immediately — grinding fresh is the entire point of owning a burr grinder; pre-ground defeats the purpose |
Troubleshooting Matrix: What Your Cup Is Telling You and How to Fix It
| Symptom | Most likely cause | Fix (in order) |
|---|---|---|
| Bitter regardless of brew time | Grind too fine; or dark roast at medium-roast setting | Grind 4–5 clicks coarser → lower water temp 2°C → dark roasts: target 88–92°C, not 93–96°C |
| Sour and thin | Grind too coarse; or light roast at too-low temperature | Grind 3–5 clicks finer → raise water temp 2°C → light roasts: target 94–96°C |
| Bitter AND sour in the same cup | Blade grinder — simultaneous over-extraction (fines) and under-extraction (large chunks) | Replace blade grinder with any burr grinder — this is the only fix |
| V60 or Chemex draw-down stalls | Grind too fine; fines clogging the paper filter | Grind 3 clicks coarser → pour bloom more slowly → confirm filter is seated flat with no folds |
| French press muddy and hard to press | Grind too fine for immersion | Grind 5+ clicks coarser → press over 30 seconds → do not force the plunger |
| Flat cup with no aroma | Stale beans — CO2 and aromatics depleted | Buy beans with a roast date under 3 weeks old — no grind or technique fix works on stale coffee |
| Good first cup, worse second from same session | Stale retained grounds from previous session contaminating fresh grind | Purge 3–5g of beans before each dose after a gap between sessions |
| Static and clumping grounds | Low bean moisture or low ambient humidity | Add one or two drops of water to beans before grinding (Ross Droplet Technique) |
| Grinder sounds strained or slows mid-grind | Setting too fine; or clogged burrs | Grind coarser; disassemble and brush clean burrs; check grinding pathway for fragments |
| Coffee tastes different with same roaster, new bag | Seasonal crop variation — bean density changes between harvest lots | Use existing setting as starting point; adjust 2–3 clicks based on taste; same roast level does not guarantee same density |
Cleaning and Maintenance: What Every Beginner Needs to Know
Coffee oil is the maintenance problem most beginners discover too late. It coats burr surfaces and grinding pathways, goes rancid within days, and produces a stale, flat off-taste that is almost universally mistaken for a bean quality problem. The cleaning routine takes under five minutes when done regularly and prevents the most common source of beginner cup quality decline.
After Every Use
- Empty the grounds bin completely — never leave spent grounds between sessions
- Wipe the grounds bin with a dry cloth to remove surface coffee oil
- For manual grinders: wipe the catch cup and reassemble loosely to allow airflow
- Never use water on burr surfaces — moisture causes corrosion and promotes rancidity
Every 2–4 Weeks (Daily Users)
- Disassemble: remove hopper, upper burr, grounds bin, and accessible internal components
- Brush all burr surfaces and grinding pathway with a stiff dry brush — never water on burrs
- For electric grinders: Urnex Grindz cleaning tablets are the easiest beginner method — run through per instructions, then purge with a sacrificial dose before your next brew
- Inspect upper burr for wear — smooth-looking burr faces (rather than sharp) indicate dull burrs that need replacing
Beginner Coffee Grinder Buying Checklist
| Question | What to confirm | Red flag |
|---|---|---|
| Is it a burr grinder? | Product confirms two abrasive burr surfaces — conical or flat — as the grinding mechanism | Any mention of a “blade,” “chopper,” or “spice and coffee grinder”; single spinning blade visible in product photos |
| What brew methods do I use? | Grind range covers your methods — drip and pour-over need 15+ settings minimum; espresso needs its own dedicated grinder | Marketed for espresso under $200 — espresso-grade precision at beginner prices is a marketing claim |
| Manual or electric? | Electric for 3+ cups daily or multiple brewers; manual for small kitchens, 1–2 cups, or travel | Electric under $40 — burrs and motor too small for consistent output at this price |
| What is the burr size? | 38mm+ for manual; 40mm+ for electric — larger means lower fines and a cleaner beginner cup | Burr size not disclosed in product specifications |
| Are replacement parts available? | Baratza and KINGrinder both sell replacement burrs directly — a repairable grinder is a long-term investment | No-brand imports with no spare parts — disposable when burrs dull |
| Do I have a kitchen scale? | A scale accurate to 1g is the essential complement to any burr grinder — dose by weight, not scoops | Planning to use a coffee scoop — light and dark roasts have different densities; scoop volume is unreliable |
Final Verdict: Best Coffee Grinder for Beginners
The best coffee grinder for beginners is the one that removes inconsistent extraction from your brewing equation and makes grinding fresh a frictionless part of your daily routine. The Baratza Encore is a practical option for most beginners buying their first electric grinder — 40 settings, a decade of proven reliability in the beginner grinder category, and replaceable parts that make it a long-term investment rather than a throwaway appliance. The KINGrinder K6 is a practical option for beginners who want the best grind quality per dollar spent, are comfortable with manual grinding for 1–2 daily cups, and want a grinder whose external adjustment settings carry across every CoffeeGearHub recipe and brewing guide. The OXO Brew Conical Burr Grinder is a practical entry point for budget-constrained beginners who need to step up from blade grinding without significant upfront cost. Whatever you choose: pair it with fresh whole beans (roast date on the bag, under three weeks old), weigh your dose in grams on a basic digital scale, and grind immediately before brewing. Those three habits, applied consistently with any quality burr grinder, will produce home coffee that surpasses the vast majority of what most beginners have ever tasted from their own kitchen.
FAQs: Best Coffee Grinders for Beginners
Is a burr grinder really worth it for beginners?
Yes — and it is the single most impactful upgrade a beginner can make. Burr grinders produce consistent particle sizes that extract evenly, producing a balanced cup. Blade grinders produce random particle sizes that over-extract and under-extract simultaneously. Even an entry-level burr grinder at $40 outperforms any blade grinder at any price.
What is the best coffee grinder for beginners?
The Baratza Encore is the best first electric burr grinder for beginners u002du002d 40 grind settings, proven consistency across drip, pour-over, and French press, and widely available replacement parts. For a manual beginner grinder, the KINGrinder K6 is the CoffeeGearHub standard recommendation. For budget-constrained beginners, the OXO Brew Conical Burr Grinder is a reliable step up from blade grinders.
What is the difference between burr and blade grinders?
Burr grinders crush beans between two abrasive surfaces set at a precise distance, producing consistent particle sizes. Blade grinders spin a blade that randomly chops beans, producing a mix of fine powder and large chunks. Consistent particle size produces even extraction and a balanced cup. Random particle size produces simultaneous over-extraction and under-extraction with no recipe adjustment capable of fixing both at once.
Manual or electric grinder: which is better for a beginner?
Both work well for beginners. Electric grinders (Baratza Encore) are faster and more convenient for daily use. Manual grinders (KINGrinder K6) are quieter, more portable, and often deliver better grind quality per dollar. For 1-2 cups daily a manual grinder is perfectly practical. For 3+ cups or multiple household brewers an electric grinder is more convenient.
Can I use one beginner grinder for all brew methods?
Yes. Any quality burr grinder with a wide adjustment range covers drip, pour-over, French press, and AeroPress. The Baratza Encore covers a broad filter range, while the KINGrinder K6 spans fine through coarse grinding and can also reach espresso-fine settings. Whether one grinder suits every method depends on the adjustment resolution you need.
What grind size should a beginner use for drip coffee?
Medium grind is the correct starting point u002du002d roughly the texture of coarse sand. KINGrinder’s current K6 chart places medium grinding around 90–120 clicks from zero. Adjust 3-5 clicks at a time and taste before changing anything else.
Why does my coffee taste bitter after I bought my first burr grinder?
A new burr grinder produces a finer effective grind than a blade grinder at any given setting. If your coffee tastes bitter after switching, grind coarser by 3-5 steps and re-brew. A new grinder also takes a short familiarization period while you learn how its numbered settings translate to your brewer.
How much should a beginner spend on a coffee grinder?
Spend enough to get a true burr grinder with repeatable adjustment. The OXO Brew is the lower-cost electric option in this guide, the KINGrinder K6 is the manual option, and the Baratza Encore is the serviceable electric choice. Check current pricing because retail prices change.
How often should a beginner clean their coffee grinder?
Wipe the grounds bin after every use. Do a full disassembly brush clean every 2-4 weeks for daily users. Coffee oils coat burr surfaces and go rancid within days, producing a stale flat taste. Use a dry brush only on burr surfaces u002du002d never water. Urnex Grindz tablets are the easiest cleaning method for beginner electric grinders.
What burr size should a beginner look for?
Burr diameter alone does not determine grind quality. The K6 uses a 48mm heptagonal stainless-steel burr and the Encore uses a 40mm conical steel burr; adjustment design, alignment, burr geometry, retention, and workflow matter too.
CoffeeGearHub shortlist
Compare CoffeeGearHub product pages
Review product specifications and current verified merchant offers on CoffeeGearHub before leaving the site.
Continue Learning
In this guide