
Best Espresso Machines for Beginners
Editorial standards: product recommendations are based on manufacturer specifications, published documentation, brewing workflow, maintenance, and product limitations. CoffeeGearHub does not claim hands-on testing where it has not occurred.
At a glance
What this buying guide covers
Compare beginner espresso machines by workflow, grinder requirements, milk steaming, upgrade path, and the amount of technique each machine asks you to learn.
Editorial analysis
Buy the workflow you want to learn
A first espresso machine should remove enough variables to make good coffee achievable without hiding every part of the process. The Bambino Plus suits buyers who want fast heat-up and easier milk steaming; the Barista Express makes sense when an integrated grinder matters more than future grinder flexibility.
The 30-Second Answer
For most beginners, the Breville Bambino Plus is the most approachable semi-automatic starting point because it heats quickly and reduces milk-steaming friction. Choose the Barista Express if you specifically want a built-in grinder and an all-in-one counter setup. Budget and upgrade-path models make sense when price or long-term modification matters more than convenience.
What Makes an Espresso Machine Beginner-Friendly?
If you’ve ever pulled two shots back-to-back and gotten completely different results, you already understand the core challenge of espresso. Unlike drip coffee or a French press, espresso is a high-pressure, low-tolerance brew method where tiny changes in grind, dose, tamp, and temperature compound fast. A beginner-friendly machine is one that reduces the number of variables you have to manage on day one — and forgives the ones you inevitably get wrong.
Here’s what actually separates a beginner-friendly machine from one that will frustrate you:
1. Simple, Repeatable Workflow
Clear buttons, fast warm-up times, and an intuitive sequence of steps help you build consistent habits quickly. Machines that require you to navigate complex menus or manually manage boiler pressure on day one will slow down your learning. The faster you can complete the grind → dose → tamp → pull loop without thinking about machine settings, the faster your shot quality improves.
2. Temperature and Pressure Stability
Espresso extraction is acutely sensitive to temperature: a swing of just 3–5°C can shift a shot from bright and sweet to flat and hollow. Machines that use a thermocoil or thermoblock (rather than a single boiler that needs manual “temperature surfing”) deliver more consistent shot-to-shot temperatures from the start. Pre-infusion — where the machine gently wets the puck before full pressure — further reduces channeling risk and makes even imperfectly tamped pucks more forgiving.
3. Pressurized Filter Baskets
Most beginner machines include pressurized (dual-wall) filter baskets alongside standard single-wall baskets. Pressurized baskets add a second restriction after the puck, which compensates for grind inconsistency and produces usable crema even when grind size isn’t dialed in perfectly. They’re training wheels — not ideal for long-term use — but they give you drinkable espresso while you develop your technique. As your grind and tamp improve, you’ll naturally want to switch to single-wall baskets for better flavor clarity.
4. Easy Cleaning and Maintenance
This is underestimated by almost every beginner. Machines with removable drip trays, accessible water tanks, simple backflush routines, and clear descaling instructions are dramatically more likely to get used consistently. The espresso habit breaks down when cleanup becomes a chore. Look for machines that provide maintenance alerts and have straightforward descaling cycles.
5. Upgrade Path
The best beginner machines let you grow. A machine with non-pressurized basket compatibility, a standard portafilter size (54mm or 58mm), and a community of owners means you can improve technique, swap accessories, and keep the machine for years rather than outgrowing it in months.
How Much Should a Beginner Spend on an Espresso Machine?
This is the first question most beginners ask, and the honest answer is: your grinder budget matters as much as your machine budget. A high-end machine paired with a blade grinder will produce worse espresso than a mid-range machine paired with a capable burr grinder. With that framing:
| Budget tier (machine only) | What to expect | Grinder strategy | Best pick |
|---|---|---|---|
| Entry | Pressurized baskets, basic temperature control, smaller steam wand | Pair with a budget burr grinder | De’Longhi Dedica EC685 |
| Mid-range | Better temperature stability, auto-frothing options, or built-in grinder | Built-in grinder (Barista Express) or separate mid-range burr grinder | Bambino Plus or Barista Express |
| Enthusiast | Commercial-grade portafilter size, manual steam wand quality, long-term durability | Separate espresso-capable burr grinder | Gaggia Classic Pro |
| Convenience | Push-button automation, built-in grinding, bean-to-cup convenience | Built-in (super-automatic) | Philips 3200 Series |
💡 Beginner budget rule: Spend at least 30–40% of your total budget on the grinder. If you have a fixed total, a capable machine + quality grinder combination will outperform a premium machine with a weak grinder every time. Your shots will be significantly better for the grinder investment.
Espresso Machine Types Explained
Before you can choose the right beginner machine, you need to understand what each machine type actually asks of you. The differences are significant — not just in price, but in how involved you are in the brewing process.
| Type | How it works | Skill required | Grinder needed? | Best for |
|---|---|---|---|---|
| Semi-automatic | You grind, dose, tamp, and start/stop the shot manually | Medium — you control most variables | Yes (separate) | Learning espresso craft; best long-term results |
| All-in-one (semi-auto + grinder) | Built-in grinder; you still dose, tamp, and pull manually | Medium — grinder is integrated but technique still needed | No (built-in) | Single-machine setup for beginners |
| Super-automatic | Everything automated: grind, dose, tamp, brew, and sometimes milk | Very low — press a button | No (built-in) | Maximum convenience; less espresso craft |
Semi-automatics are the most common beginner recommendation because they teach you the fundamentals that make espresso taste good. Super-automatics are excellent if coffee is fuel and convenience is the priority — but they’re a different category of appliance. This guide covers both.
Compare current options
Two beginner setups to compare first
These two machines represent the most common beginner decision: a compact machine paired with a separate grinder versus an all-in-one machine with a built-in grinder.
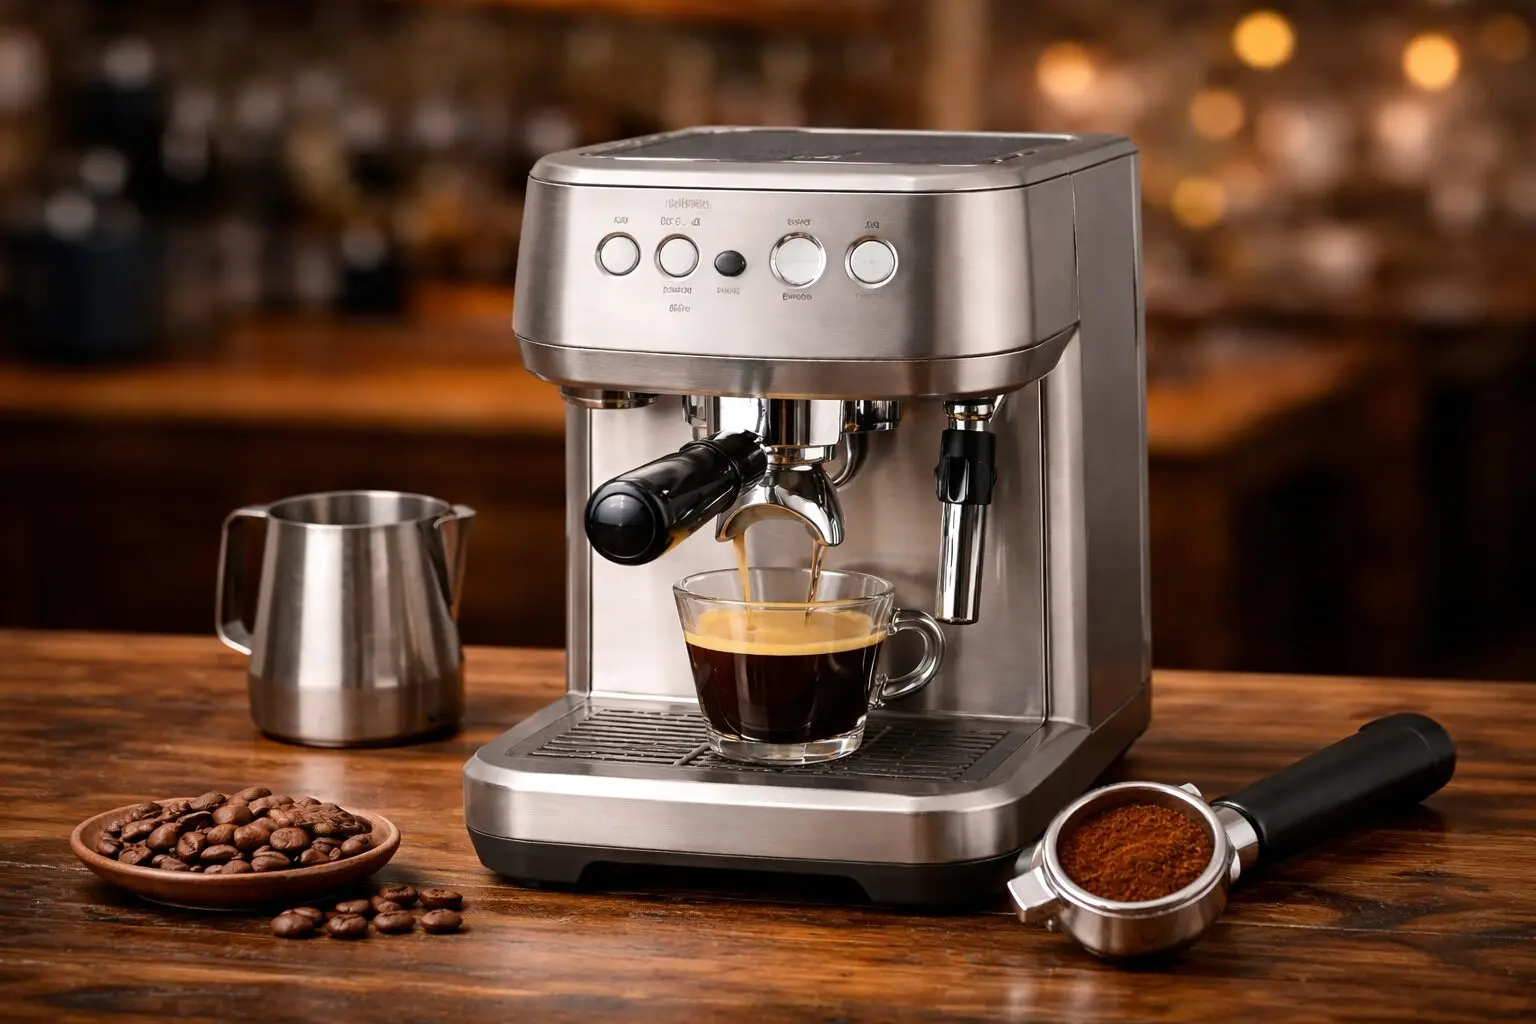
Breville Bambino PlusCompact semi-automatic option with rapid heat-up and automatic milk texturing.Check current Amazon offer →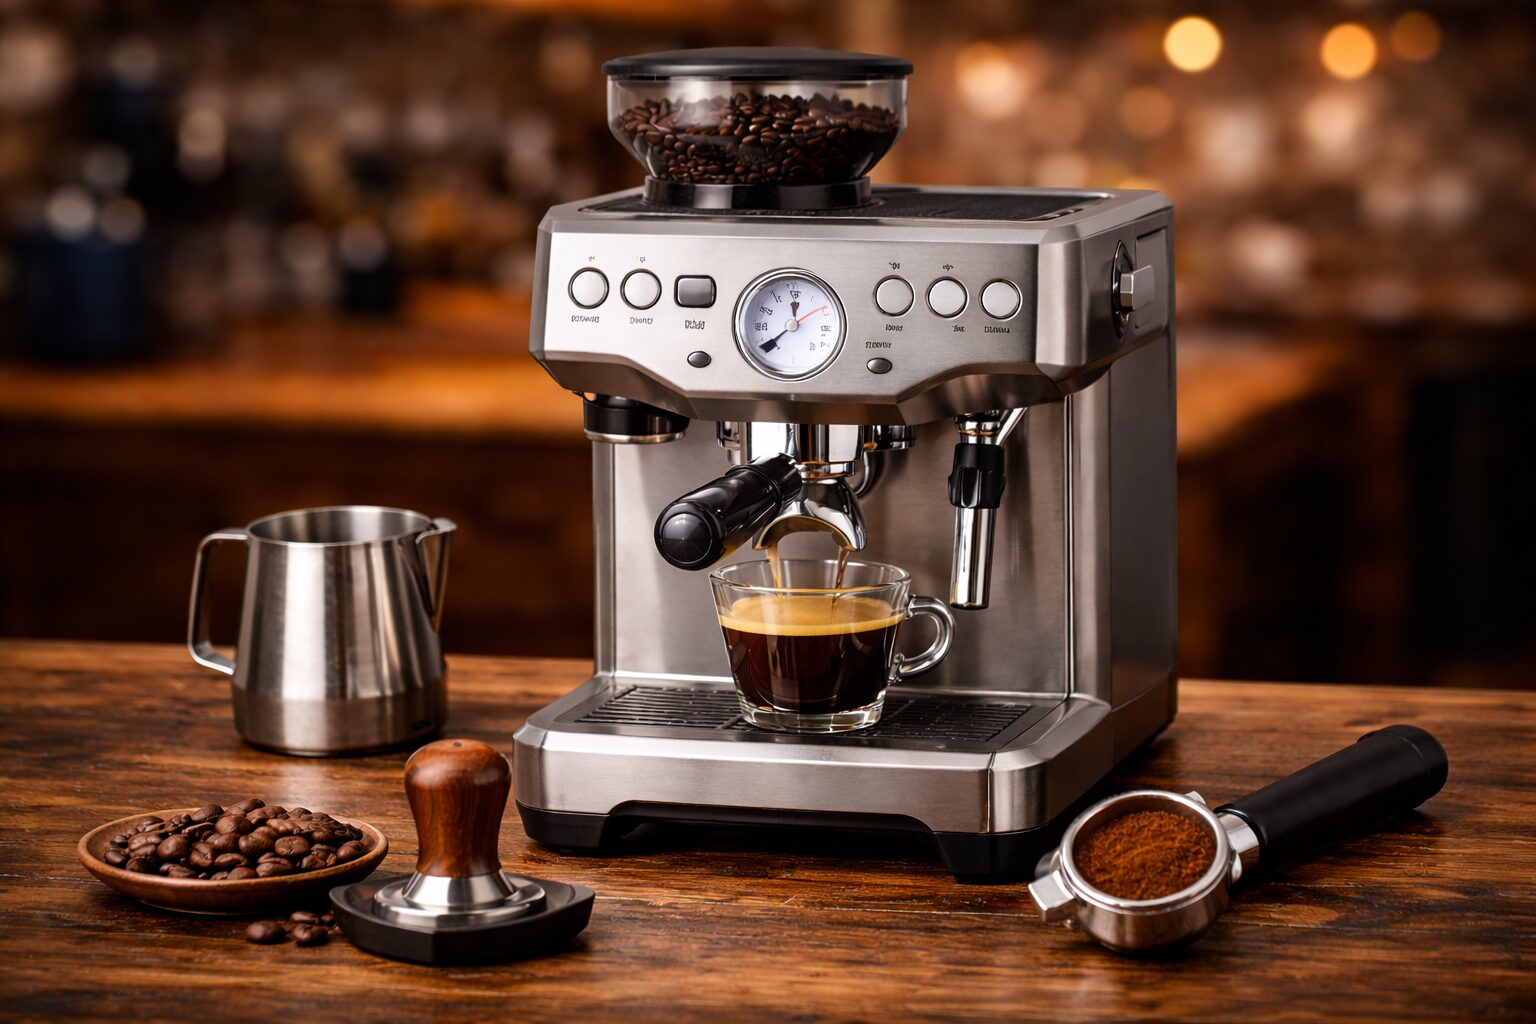 Breville Barista ExpressAll-in-one starter setup with an integrated conical-burr grinder and manual steam wand.Check current Amazon offer →
Affiliate disclosure: These Amazon links may earn CoffeeGearHub a commission at no additional cost to you. Prices and availability can change.
Best Espresso Machines for Beginners: Detailed Reviews
Full specs, pros, cons, and who each machine is best for. Use the “Best For” badges to self-select quickly.
Best Overall Beginner Machine: Breville Bambino Plus
🏆 BEST OVERALL — Fastest path to great lattes & cappuccinos
Why It’s the Top Beginner Pick
The Bambino Plus wins for beginners because it removes two of the hardest variables to learn simultaneously: temperature consistency and milk frothing. Its thermojet heating system reaches brew temperature in roughly 3 seconds, eliminating the warm-up ritual and shot-to-shot temperature variation that trips up beginners on older single-boiler machines. The automatic steam wand senses milk temperature and stops automatically — meaning you get properly textured milk without the months of wrist-angle practice that manual wands require.
- Portafilter: 54mm (non-pressurized baskets available for upgrade)
- Pressure: 9 bar (with OPV set correctly)
- Pre-infusion: Yes (automatic 3-second pre-soak)
- Warm-up time: ~3 seconds
✅ Pros
- 3-second heat-up — fastest on this list
- Auto milk wand: café-quality foam day one
- Built-in pre-infusion reduces channeling
- Ships with pressurized + non-pressurized baskets
- Compact footprint
⚠️ Watch-Outs
- No built-in grinder — separate purchase needed
- 54mm portafilter (not the 58mm community standard)
- Smaller 1.9L water tank
- Auto wand limits manual texture control
Disclosure: CoffeeGearHub may earn from qualifying purchases.
🔬 Extraction note: The Bambino Plus ships with both pressurized and non-pressurized baskets. Use the pressurized basket while learning grind size; switch to non-pressurized once you’re pulling consistent 25–30 second shots with your grinder dialed in. The flavor difference is immediately noticeable.
If you’re pairing the Bambino Plus with a separate grinder, start here: Best Burr Grinders for Espresso. Then use our Grind Size Explained guide to dial in.
Best All-in-One Starter: Breville Barista Express
⚙️ BEST ALL-IN-ONE — One machine, one learning loop, no separate grinder
One Machine, One Learning Loop
The Barista Express is the classic beginner choice because it keeps the learning loop tight. With a conical burr grinder built directly into the machine, you grind → dose → tamp → pull without ever moving beans between appliances. For someone new to espresso, this integration is genuinely useful: you adjust one grind dial, pull a shot, taste it, and adjust again. The feedback is immediate and the workflow is simple.
- Portafilter: 54mm (non-pressurized baskets included)
- Grinder: Integrated conical burr (60-step adjustment)
- Pressure: 9 bar (OPV adjustable)
- Frothing: Manual steam wand
✅ Pros
- No separate grinder purchase needed
- Immediate grind → taste feedback loop
- 60-step grind adjustment is precise enough for most
- Strong resale value and large community
⚠️ Watch-Outs
- Built-in grinder not as capable as a standalone
- Manual steam wand takes weeks to learn
- Larger countertop footprint than the Bambino Plus
- Pour-over use requires a separate grinder anyway
Disclosure: CoffeeGearHub may earn from qualifying purchases.
💡 Barista Express dial-in tip: Start at grind setting 5 with the included single-wall basket. If your shot runs faster than 20 seconds, go one step finer. If the press stalls or tastes bitter at 30+ seconds, go one step coarser. Most medium roasts dial in between settings 4–7.
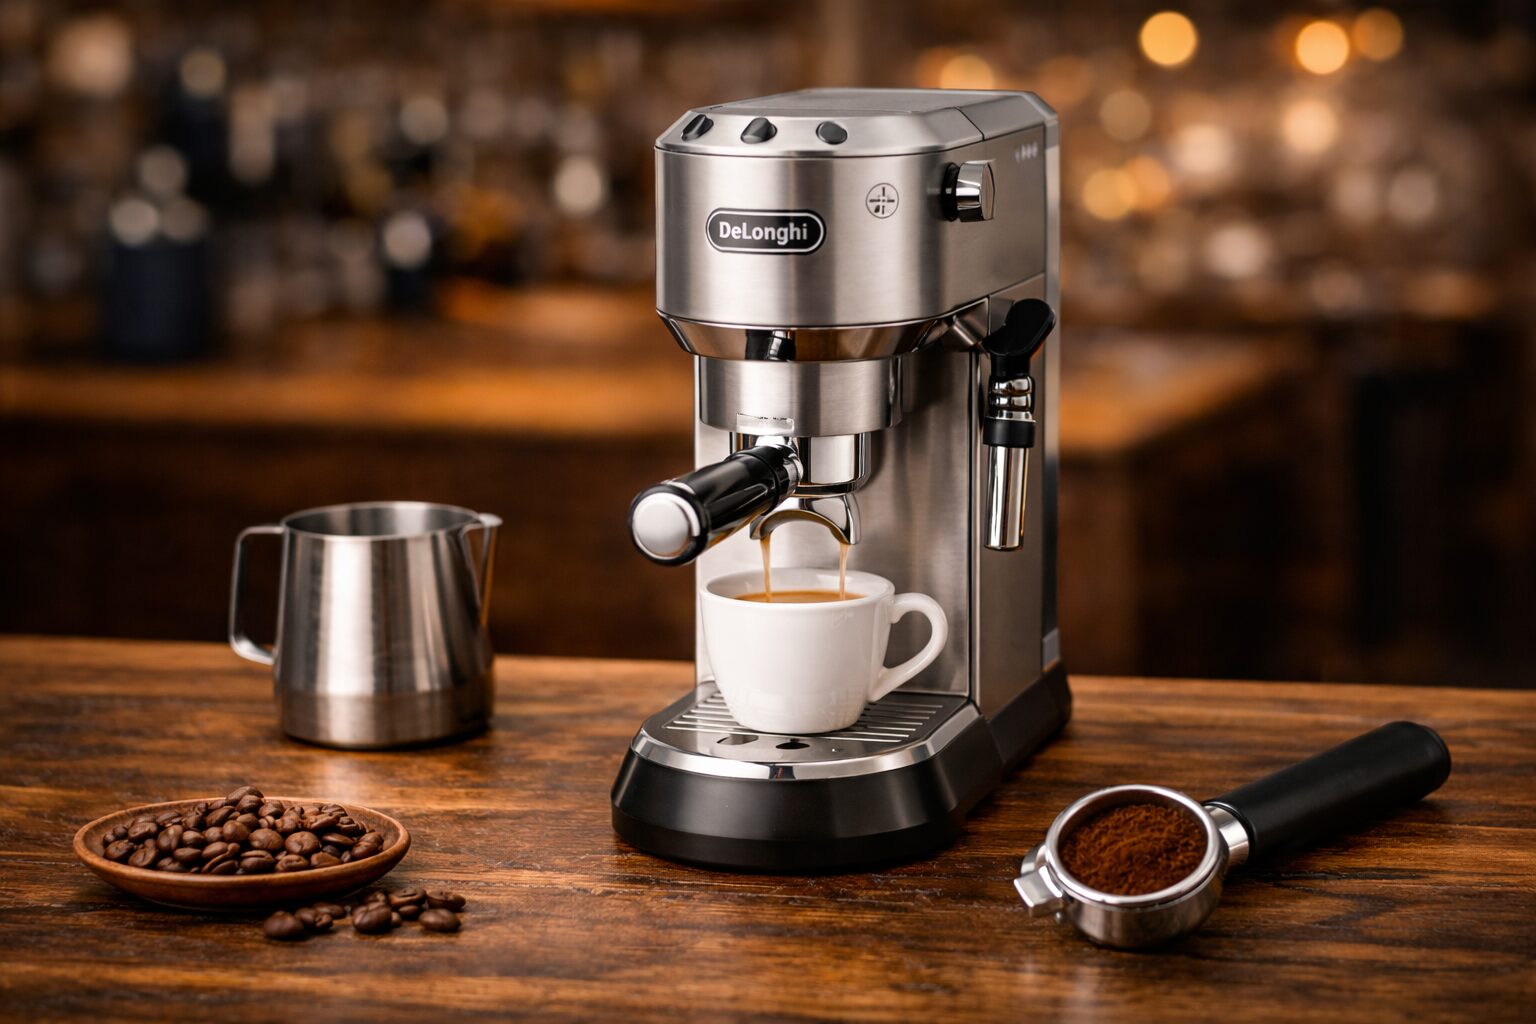
Best Budget Espresso Machine: De’Longhi Dedica EC685
💰 BEST BUDGET — Real espresso at minimal cost; fits tiny kitchens
Real Espresso at Minimal Cost
The Dedica EC685 punches well above its price by delivering genuine pump-driven espresso in a footprint barely wider than a paperback book. At roughly 6 inches wide, it fits where most espresso machines simply can’t. The included pressurized baskets produce satisfying crema and drinkable shots even when your grind isn’t perfectly calibrated — which is exactly what a budget beginner machine should do while you develop your technique and eventually upgrade to non-pressurized baskets.
- Portafilter: 51mm (proprietary — limits third-party accessory options)
- Pressure: 15 bar pump (with internal OPV at ~9 bar effective)
- Frothing: Manual panarello wand (can be modded for manual steaming)
✅ Pros
- Lowest price on this list for real pump espresso
- Only ~6 inches wide — fits any counter
- Pressurized baskets very forgiving for beginners
- Decent steam wand (panarello is beginner-friendly)
⚠️ Watch-Outs
- 51mm proprietary portafilter limits accessories
- Less temperature stability than mid-range machines
- Panarello wand won’t teach manual frothing technique
- You will want to upgrade within 1–2 years
Disclosure: CoffeeGearHub may earn from qualifying purchases.
🔬 Grind tip for the Dedica: If shots taste sour or watery, go finer. If they taste bitter or the machine struggles to push water through, go coarser. The pressurized basket will mask some of these symptoms — switch to a non-pressurized basket when you’re ready for accurate taste feedback. See our Grind Size Explained guide for a complete dial-in system.
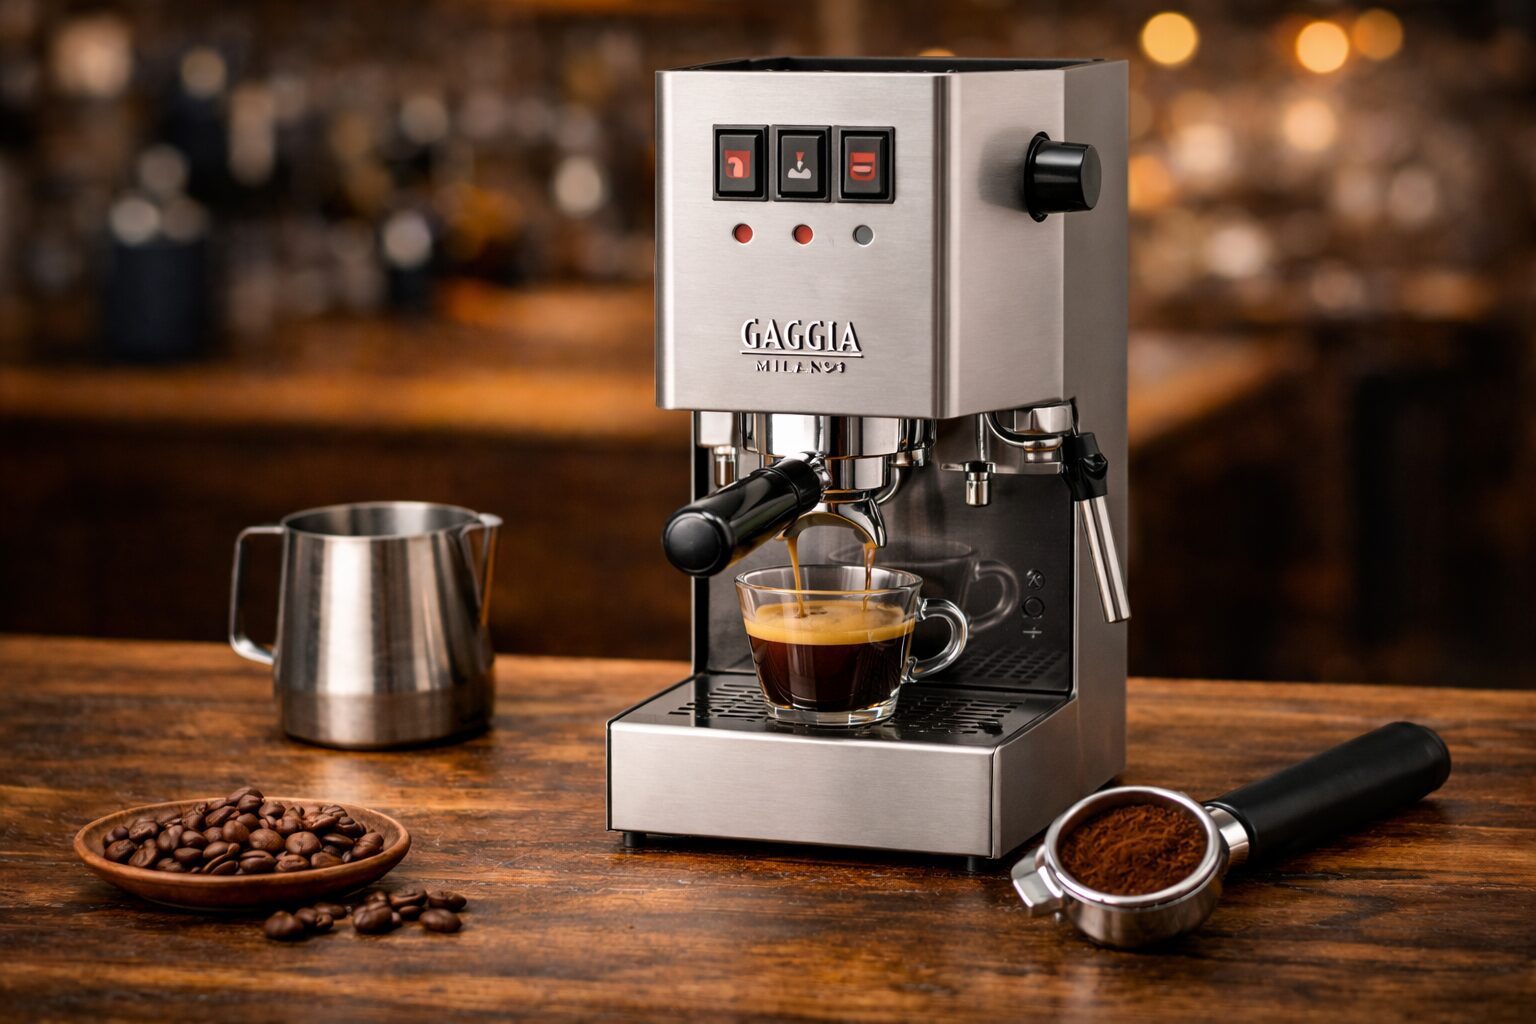
Best Long-Term Upgrade Path: Gaggia Classic Pro
📈 BEST UPGRADE PATH — The machine you won’t outgrow; 58mm commercial standard
The Machine You Won’t Outgrow
The Gaggia Classic Pro has been a home espresso standard for over three decades, and the Pro version — with its commercial-style 58mm portafilter, 3-way solenoid valve, and stainless steel construction — represents the most capable beginner machine you can buy without stepping into prosumer territory. The 58mm group head means you have access to the widest range of aftermarket baskets, tampers, puck screens, and accessories available for any home machine. The large enthusiast community means tutorials, mods, and troubleshooting resources are everywhere.
- Portafilter: 58mm (commercial standard — widest accessory compatibility)
- Boiler: Single aluminum boiler (some temperature surfing needed without PID mod)
- Frothing: Manual commercial-style steam wand
- Upgrades: PID controller mod available for ~$100; widely documented
✅ Pros
- 58mm commercial portafilter — best accessory ecosystem
- Stainless steel build — will last 10+ years
- Owner-repairable; massive mod community
- 3-way solenoid valve — clean, dry pucks
- Strong resale value after years of use
⚠️ Watch-Outs
- Steeper learning curve than “push button” options
- Temperature surfing needed without PID mod
- Manual steam wand takes significant practice
- No pre-infusion out of the box
Disclosure: CoffeeGearHub may earn from qualifying purchases.
💡 Pairing advice: The Gaggia Classic Pro rewards a quality grinder more than any other machine on this list. Pair it with an espresso-capable burr grinder — see Best Burr Grinders for Espresso. If budget allows, the KINGrinder K6 is a strong manual option; the Baratza Encore ESP is the go-to electric choice.
Best Super-Automatic for Beginners: Philips 3200 Series
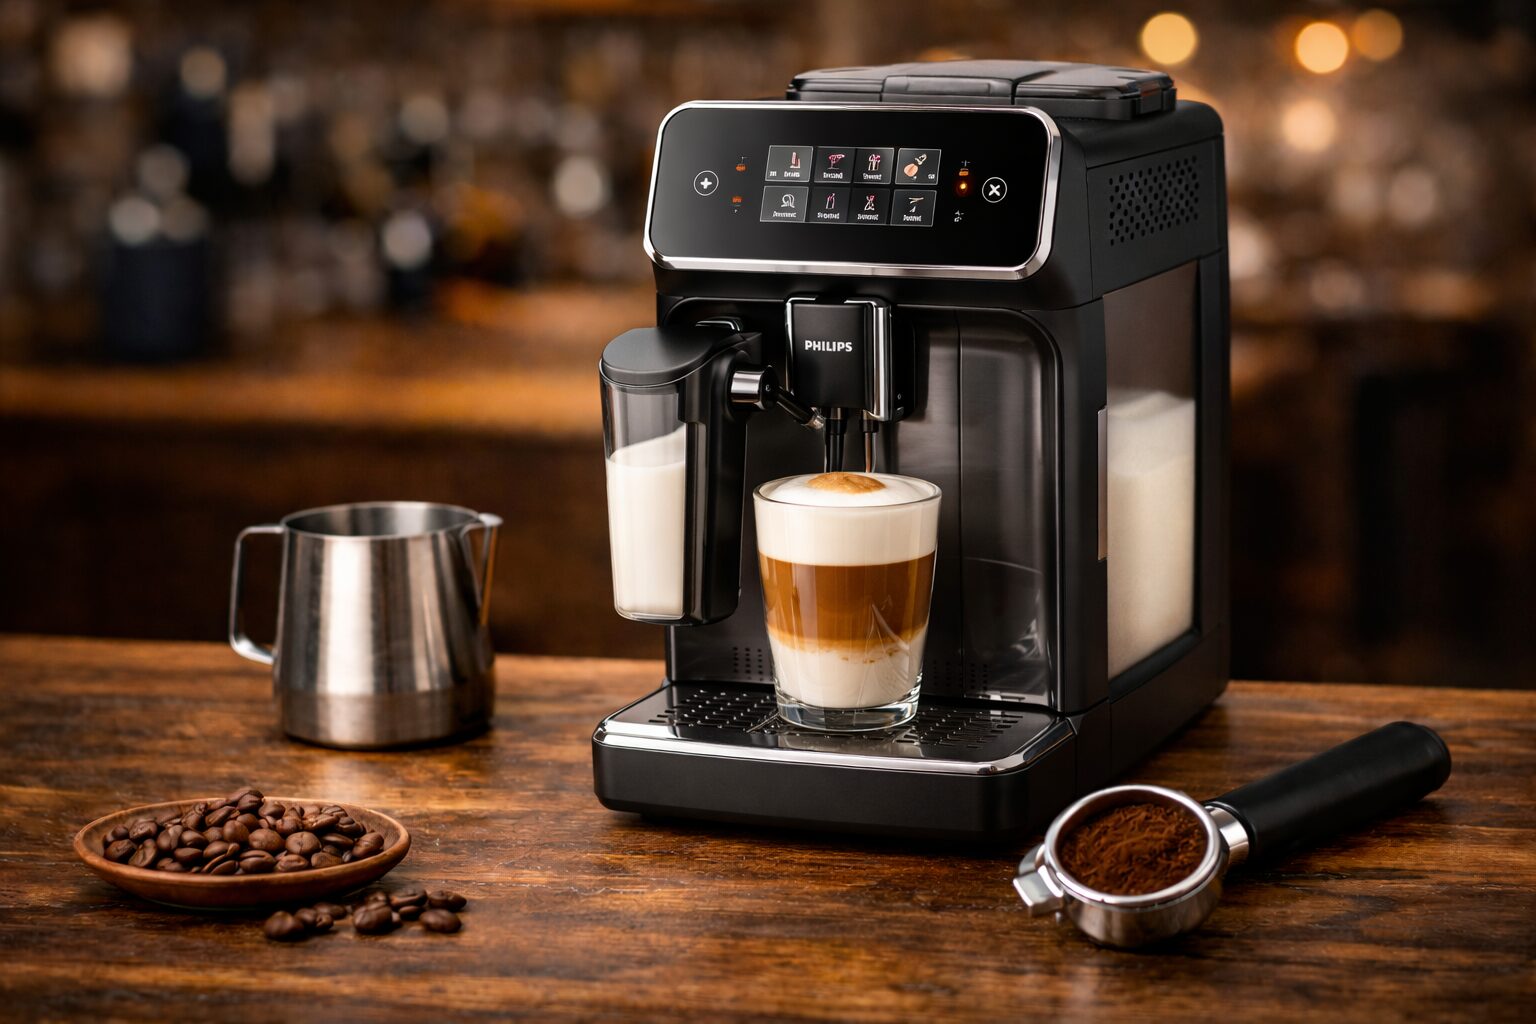
☕ BEST SUPER-AUTO — Coffee as fuel; zero technique required
Press a Button, Get Espresso
The Philips 3200 Series occupies a different category than the semi-automatics above — it’s not a machine that teaches you espresso, it’s a machine that makes espresso for you. The internal ceramic burr grinder, programmable drink profiles, and automated maintenance reminders mean you spend zero time on technique and all of your time simply enjoying the coffee. The LatteGo milk system (on higher-tier 3200 models) is one of the cleanest and easiest automatic milk frothers available at this price point.
- Grinder: Built-in ceramic burr (adjustable hardness setting, not grind size dial)
- Drink programs: Espresso, lungo, americano (milk drinks on LatteGo models)
- Maintenance: Automated reminders for descaling and cleaning
✅ Pros
- Zero technique required — push one button
- Fully integrated: grinder + brewer in one
- LatteGo system is very easy to clean
- Automated descaling reminders
⚠️ Watch-Outs
- No transferable espresso skills developed
- Very limited manual control over flavor
- Complex internals = expensive repairs
- Shorter practical lifespan than semi-autos
Disclosure: CoffeeGearHub may earn from qualifying purchases.
Espresso Extraction Science: Why Technique Matters
Understanding what’s happening inside the portafilter during a shot helps you diagnose problems faster and make better adjustments. Espresso is extracted by forcing hot water at roughly 9 bar of pressure through a compacted bed of fine coffee grounds. The puck is the key: it acts as a filter that controls both the flow rate and the contact time between water and coffee.
Extraction happens in sequence as water dissolves different compounds at different rates:
- Early extraction: Acids and salts dissolve first — contributing brightness and the initial “snap” of espresso
- Mid extraction: Sugars and aromatics — the sweetness, body, and “espresso character” you’re chasing
- Late extraction: Bitter phenolics and astringent compounds — the drying, harsh finish you want to avoid
A 25–30 second shot (measured from when espresso first appears, to when the shot reaches your target yield) hits the sweet spot for most medium roasts — enough time to extract sweetness without pushing into late-extraction bitterness. Everything that makes a beginner machine “beginner-friendly” is ultimately designed to help you land in that extraction window consistently.
The Four Variables You Control
| Variable | What it controls | Beginner target | Common mistake |
|---|---|---|---|
| Grind size | Flow rate through the puck | Start in the grinder’s espresso range and adjust finer/coarser by measured flow and taste | Treating one setting or shot time as universal |
| Dose | Coffee mass and puck depth | Use a dose that fits the basket and keep it stable while dialing in | Eyeballing rather than weighing |
| Tamp | Puck level and consistency | Tamp level until the puck is fully compressed | Uneven tamp causing channeling |
| Temperature | Extraction behavior and flavor | Use machine default or coffee guidance first, then adjust after the recipe is stable | Changing temperature while grind, dose, or yield are still uncontrolled |
Milk Frothing for Beginners: Steam Wand vs Automatic
Milk drinks — lattes, cappuccinos, flat whites — are where most beginners want to start. The frother type matters enormously for how quickly you’ll get good results.
☕ Automatic Steam Wand
Found on: Bambino Plus, Philips 3200
- Senses temperature; stops automatically
- Consistent microfoam from day one
- No wrist technique required
- Limited control over texture
🎛 Manual Steam Wand
Found on: Barista Express, Dedica, Gaggia Classic Pro
- Full control over texture and temperature
- Takes 2–4 weeks to get consistently good
- Best results for latte art
- Requires purging before and after each use
Quick frothing guide for manual wands: Submerge the tip just below the milk surface. Open the steam valve fully. Keep the tip near the surface for the first 5–8 seconds to incorporate air (listen for a gentle hissing “paper tearing” sound — not loud bubbling). Then angle the pitcher to create a swirling vortex and heat until the pitcher is too hot to touch comfortably (approximately 60–65°C). Tap the pitcher on the counter and swirl to integrate the foam before pouring.
What Else Do Beginners Need?
Even the best beginner machine gets dramatically better with a few essentials. These aren’t optional extras — they’re the items that separate “this machine is frustrating” from “I’m actually pulling good shots.”
1. An Espresso-Capable Burr Grinder (Non-Negotiable)
If your machine doesn’t include a grinder, this is your most important purchase. Espresso requires fine, consistent, repeatable grinding that blade grinders and most “coffee grinders” simply cannot deliver. A burr grinder creates a narrow particle distribution — meaning most grounds are the same size — so your adjustments produce predictable results. A blade grinder creates a mix of fine powder and large chunks that brew simultaneously at different rates, producing shots that taste sour and bitter at the same time.
Start here: Best Burr Grinders for Espresso. For grind size fundamentals, see: Grind Size Explained.
2. A Digital Scale
A 0.1g resolution scale makes espresso easier to repeat because you can hold dry dose and beverage yield steady while testing other variables. A ratio around 1:2 is a useful neutral starting point for many coffees, but it is not a universal target and shot time should be treated as a flow diagnostic rather than a pass/fail rule. Without a scale, dose and yield can drift at the same time, making troubleshooting harder.
3. Fresh Beans
Use coffee with a roast date and follow the roaster’s recommended rest or brew window when one is provided. The useful window varies with roast, processing, packaging, storage, and recipe, so avoid treating one number of days after roast as universal. For bean selection guidance, see our Espresso Beans vs Coffee Beans guide.
4. A Quality Tamper
Most machines include a plastic tamper that is technically functional but sized poorly (usually 49–51mm for a 58mm basket). An uneven or undersized tamp creates channels in the puck where water takes the path of least resistance, bypassing most of the coffee bed. A correctly sized, flat-based tamper that fits your portafilter makes an immediate and noticeable difference in shot consistency.
Troubleshooting Your First Shots
Start with grind. Almost every beginner shot problem is a grind problem in disguise. Work through this matrix before changing anything else.
| Symptom | What it usually means | Fix (in order) |
|---|---|---|
| Shot runs too fast (under 20s); tastes sour/watery | Too coarse / under-extracted | Grind finer → check dose (increase slightly) → increase brew temp |
| Shot runs too slow (over 35s); tastes bitter or astringent | Too fine / over-extracted | Grind coarser → check tamp evenness → reduce dose slightly |
| Shot channels (spurts, uneven flow) | Uneven tamp or distribution | Level the puck before tamping → tamp straight down → consider a WDT tool |
| Good flavor but too weak/watery | Strength issue (ratio too low) | Increase dose by 1–2g OR reduce yield target — do NOT go finer |
| No crema / flat-looking shot | Stale beans or pressurized basket masking issues | Use fresher beans (check roast date) → switch to non-pressurized basket |
| Tastes both sour AND bitter | Inconsistent grind distribution (boulders + fines) | Upgrade from blade grinder to burr grinder — this is the #1 fix |
| Shot won’t start / machine blocks | Puck too dense; grind too fine | Grind coarser → reduce dose → check basket for blockage |
🔬 The “sour AND bitter” signal: This specific combination — simultaneously sharp and drying — is the clearest diagnostic sign that you’re running a blade grinder or a grinder with severe particle inconsistency. No amount of grind adjustment will fix it. A burr grinder upgrade produces an immediate, dramatic improvement on the very first shot.
Full Machine Comparison
| Machine | Workflow Difficulty | Best Drink Style | Grinder Needed? | Portafilter | Upgrade Path | Who Should Buy |
|---|---|---|---|---|---|---|
| Bambino Plus | Easy | Milk drinks, lattes | Yes (separate) | 54mm | Good (non-pressurized baskets available) | Fastest path to great home lattes |
| Dedica EC685 | Easy | Espresso + basic milk | Yes (separate) | 51mm | Limited (proprietary size) | Budget shoppers + small kitchens |
| Barista Express | Easy → Medium | Learn espresso basics | No (built-in) | 54mm | Good | Single-machine convenience learners |
| Gaggia Classic Pro | Medium | Traditional espresso | Yes (separate) | 58mm | Excellent (58mm standard) | Long-term hobbyists; won’t outgrow |
| Philips 3200 | Very easy | Convenience drinks | No (built-in) | N/A | Low | Push-button priority; coffee as fuel |
Final Verdict: Which Beginner Espresso Machine Should You Buy?
Choose By Priority
- Fastest path to great espresso drinks: Breville Bambino Plus →
- Best budget beginner option: De’Longhi Dedica EC685 →
- Best all-in-one starter machine: Breville Barista Express →
- Best machine you won’t outgrow: Gaggia Classic Pro →
- Best for push-button convenience: Philips 3200 Series →
Don’t Forget Your Grinder
Four of the five machines above require a separate grinder. Espresso quality depends on it more than any other variable. If you’re buying soon, pair your machine choice with a grinder pick before you finalize your budget.
FAQs: Best Espresso Machines for Beginners
Is espresso hard to learn for beginners?
Do beginners need a grinder for espresso?
What’s the difference between pressurized and non-pressurized baskets?
Are super-automatic espresso machines worth it for beginners?
What is the best beginner espresso machine for lattes and cappuccinos?
What’s the most common beginner mistake with espresso machines?
How much should I spend on a beginner espresso machine?
Can I use pre-ground coffee in a beginner espresso machine?
What is a 1:2 brew ratio and do I need to track it?
How long do beginner espresso machines last?
CoffeeGearHub shortlist
Compare CoffeeGearHub product pages
Review specifications and current verified merchant offers on CoffeeGearHub before leaving the site.
Continue Learning
In this guide
- The 30-Second Answer
- What Makes an Espresso Machine Beginner-Friendly?
- How Much Should a Beginner Spend on an Espresso Machine?
- Espresso Machine Types Explained
- Best Espresso Machines for Beginners: Detailed Reviews
- Best Overall Beginner Machine: Breville Bambino Plus
- Best All-in-One Starter: Breville Barista Express
- Best Budget Espresso Machine: De’Longhi Dedica EC685
- Best Long-Term Upgrade Path: Gaggia Classic Pro
- Best Super-Automatic for Beginners: Philips 3200 Series
- Espresso Extraction Science: Why Technique Matters
- Milk Frothing for Beginners: Steam Wand vs Automatic
- What Else Do Beginners Need?
- Troubleshooting Your First Shots
- Full Machine Comparison
- Final Verdict: Which Beginner Espresso Machine Should You Buy?
- FAQs: Best Espresso Machines for Beginners
- Continue Learning