
How to Use a Moka Pot: Step-by-Step Brewing, Ratios by Pot Size, and Fixes (2026)
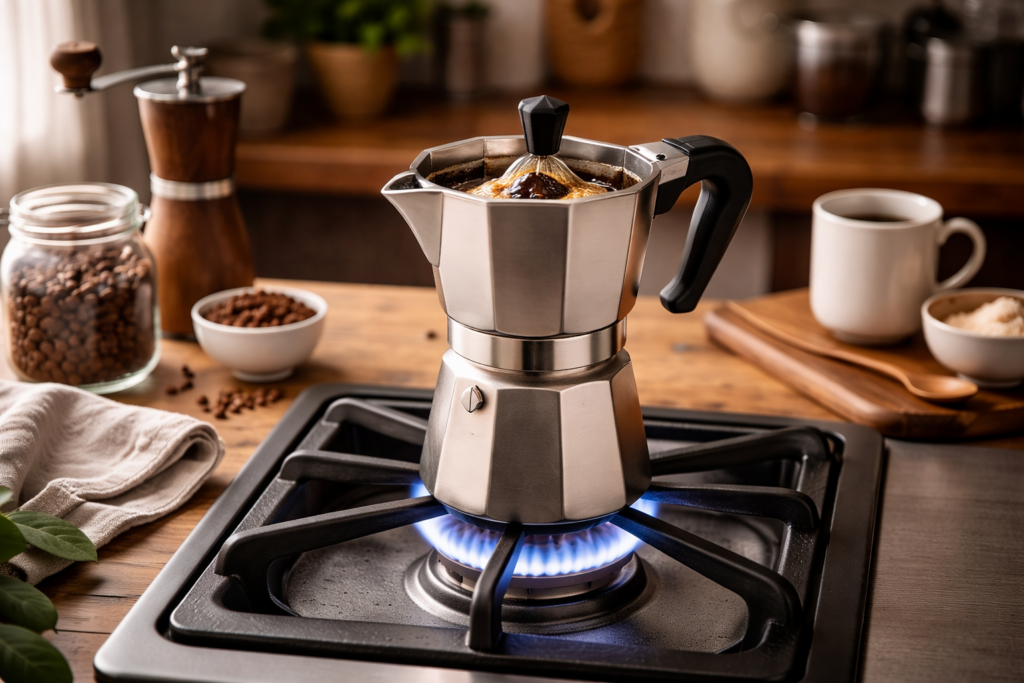
Editorial standards: this guide to how to use a moka pot draws on moka pot makers’ published instructions, Specialty Coffee Association extraction concepts, and owner and reviewer reports. Doses, timings, and grind settings are starting points to adjust by taste. CoffeeGearHub does not claim hands-on testing where it has not occurred.
At a glance
What this how to use a moka pot guide covers
What you need, a seven-step brewing method, grind size, coffee and water by pot size, heat settings for gas, electric, ceramic and induction stoves, how to read the brew and when to stop, milk drinks, common mistakes, cleaning and seasoning, choosing a pot, and a symptom-based troubleshooting table.
Editorial analysis
Medium-fine grind, gentle heat, and an early stop
Learning how to use a moka pot well comes down to three habits. Grind medium-fine rather than espresso-fine, fill the basket fully without tamping, and brew on gentle heat so the coffee flows out as a slow, steady, dark stream rather than a violent gush.
The third habit matters most and is the one most people skip: take the pot off the heat as soon as the stream turns pale and starts to gurgle. The last part of a moka brew is steam and very hot water forced through spent grounds, and it is where most bitterness comes from.
The 30-Second Answer
Fill the base with just-boiled water to below the safety valve, fill the basket level with medium-fine coffee without tamping, screw the pot together firmly, and brew on medium-low heat with the lid open.
Remove the pot when the stream turns pale and starts to sputter, cool the base under cold water, stir the coffee in the top chamber, and serve immediately.
Compare current options
Start with these representative choices
A classic pot, a stainless option for induction, and a grinder that handles the moka range.

Bialetti Moka Express — Classic reference
The aluminum original that most moka pot instructions, including these, are written around.
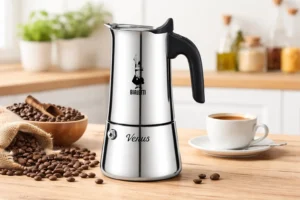
Bialetti Venus — Stainless and induction-ready
A stainless steel pot that works on induction as well as gas and electric hobs.

KINGrinder K6 — Grind control
A hand burr grinder with fine adjustment across the medium-fine moka range.
Affiliate disclosure: Amazon links may earn CoffeeGearHub a commission at no additional cost to you. Prices and availability can change.
How a Moka Pot Works
Before learning how to use a moka pot, it helps to know what is happening inside it. A moka pot has three parts: a lower chamber that holds water, a funnel-shaped basket that holds ground coffee, and an upper chamber that collects the finished brew. As the water heats, steam builds pressure in the sealed base and pushes hot water up through the coffee and out of a central column into the top chamber.
That pressure is far lower than an espresso machine’s, usually around one to two bars rather than nine, so moka coffee is strong and concentrated but not true espresso. It also means the brew depends on a good seal, a coffee bed that lets water through at a steady rate, and heat that builds pressure gently. Almost every technique in this guide exists to protect one of those three conditions.
What You Need to Brew Moka Pot Coffee
Moka brewing needs very little equipment, which is a large part of its appeal. You need the pot itself, sized to your household; a three-cup pot is the easiest starting point for most people. You need coffee, either whole beans you grind yourself or pre-ground coffee labeled for moka or stovetop brewing. Medium and medium-dark roasts are the most forgiving while you learn.
A kettle for preheating the water is optional but strongly recommended. If you buy whole beans, a burr grinder such as the KINGrinder K6 gives an even medium-fine grind, while blade grinders produce a mix of dust and chunks that makes consistent moka difficult. A small kitchen scale helps while you dial in, and filtered water improves flavor if your tap water is hard or heavily chlorinated. You do not need a tamper or a thermometer.
Step-by-Step: How to Use a Moka Pot
Follow these steps closely for your first few brews, until the routine becomes automatic. Most problems, especially bitterness and sputtering, trace back to the water, the basket fill, the heat, or stopping too late, so those steps get the most detail.
Step 1: Preheat the water
Bring water to a boil in a kettle, then pour it into the lower chamber up to just below the safety valve, the small metal fitting on the inside wall of the base. Never cover the valve. Starting with hot water is one of the most effective ways to reduce bitterness, because cold water leaves the coffee sitting over the flame for several minutes while the pot slowly heats, which starts extracting harsh compounds before the brew has really begun.
Step 2: Fill the basket without tamping
Grind your coffee medium-fine and fill the basket completely, letting it mound slightly above the rim. Then level it with a finger or a flat edge and wipe any grounds off the rim. Do not press the coffee down. The basket should be full, but the surface should be flat and loose. Tamping is the most common cause of pressure spikes, blocked pots, and harsh cups.
Step 3: Assemble the pot firmly
Place the basket in the base, using a cloth or oven mitt because the base is hot from the preheated water. Screw the top section on firmly, holding the body of the pot rather than the handle so you do not loosen or damage the handle. A loose assembly lets steam escape around the seal instead of pushing through the coffee, which leads to leaks and a weak brew.
Step 4: Brew on medium-low heat with the lid open
Set the pot on medium-low heat. On gas, keep the flame under the base; flame climbing the sides overheats the upper chamber and scorches the coffee as it arrives. Leave the lid open so you can watch and hear the brew. Gentle heat is the second most important variable after grind. High heat pushes water through too hot and too fast, and that is a common reason people think moka coffee is always bitter.
Step 5: Watch the coffee emerge
After a few minutes, depending on pot size and stove, you will hear a low hiss and see dark coffee begin to flow from the central column. This first stream is the sweetest and most concentrated part of the brew and should look deep brown and slow, almost syrupy. Keep the heat steady; turning it up to speed things along only makes the cup harsher.
Step 6: Remove from the heat before it gurgles
Watch the color of the stream. When it shifts from dark brown to pale tan or blonde, or when the gentle hiss turns into an aggressive gurgle, take the pot off the heat straight away. That sputtering phase is not the finish line; it is the warning sign of over-extraction. To stop the brew completely, run the base under cold tap water for several seconds, which drops the pressure and halts the flow.
Step 7: Stir and serve immediately
Stir the coffee in the upper chamber with a spoon, because the strong early coffee and the lighter later coffee separate into layers. Pour into warmed cups right away. Leaving the pot on a warm burner or letting the coffee sit in the hot aluminum makes it taste stewed and bitter within minutes, so brew only what you will drink.
Best Grind Size for Moka Pot
Grind size affects moka pot results more than any other single variable. The target sits between drip and espresso: think fine sand, with particles that are clearly defined rather than powdery. This is coarser than a true espresso machine needs and finer than a pour-over or drip machine uses. Too fine, and the bed resists the water so much that pressure spikes and the cup turns bitter. Too coarse, and water races through before the flavor dissolves, producing a thin, sour, hollow cup.
Start at medium-fine on your first brew. If the coffee tastes bitter or the brew sputters early, go one step coarser. If it tastes sour, thin, or hollow, go one step finer. Change only the grind between brews and keep everything else the same; it usually takes two to four brews to find the sweet spot for a new coffee. Dark roasts often need a step or two coarser, and light roasts a step or two finer. Our moka pot grind size guide gives grinder-specific starting points.
Coffee and Water by Pot Size
Moka pots are sized in cups, but those are small espresso-style servings of around 40 to 50 milliliters, not the mugs most people picture. The key rule is to fill the basket completely for the pot you have. A half-filled basket lets water rush through unevenly and produces a flat, sour cup. If you want less coffee, use a smaller pot rather than underfilling a larger one.
| Pot size | Coffee (full basket) | Water in base | Approximate yield |
|---|---|---|---|
| 1-cup | 5 to 7 g | 50 to 60 ml | About 40 ml |
| 3-cup | 15 to 18 g | 130 to 150 ml | About 120 ml |
| 6-cup | 28 to 32 g | 280 to 300 ml | About 240 ml |
| 9-cup | 42 to 48 g | 430 to 460 ml | About 360 ml |
| 12-cup | 55 to 65 g | 560 to 600 ml | About 480 ml |
These are approximate starting points. Basket capacity varies by brand and model, so weigh a full, level basket in your own pot once and use that as your dose. Larger pots take longer to heat and run longer overall, so they benefit from especially gentle heat and an early stop.
Heat Settings for Gas, Electric, Ceramic, and Induction
Heat is the variable most people get wrong when they learn how to use a moka pot. The instinct is to turn the burner up to speed the brew, and the result is harsh coffee and an uncontrolled, sputtering finish. On gas, use the lowest flame that burns steadily and keep it under the base; if the flame reaches up the sides, move to a smaller burner or use a diffuser ring. A three-cup pot on gas with preheated water usually takes four to six minutes.
Electric coil and ceramic glass hobs heat slowly and keep heating after you turn them off, so use medium-low, watch closely, and be ready to lift the pot off and cool the base under water. Induction heats fast and responds instantly, but only works with stainless steel pots that have a magnetic base, such as the Bialetti Venus or the Bialetti Moka Induction. Classic aluminum pots need an induction adapter plate, which adds a little heat-up time.
How to Read the Brew and When to Stop
A moka pot tells you how the brew is going if you watch and listen. A good brew starts with a quiet period while the water heats, then a gentle hiss and a slow, dark, syrupy stream that gradually lightens to a honey color. If coffee spurts out violently from the start, the heat is too high. If nothing comes out for a long time and then it bursts through, the grind is likely too fine or the basket was tamped.
The moment to stop is when the stream turns pale and the sound changes to a bubbling gurgle. At that point most of the water has passed through, and what follows is steam and very hot water pushed through grounds that have already given up their best flavors. Stopping a little early, with some water still left in the base, gives a noticeably cleaner, sweeter cup than letting the pot run dry.
Making Milk Drinks With Moka Coffee
Once you know how to use a moka pot, its concentrated coffee is strong enough to stand up to milk, which makes it a good base for lattes, cappuccino-style drinks, and iced coffee at home without an espresso machine. Brew as usual, then add steamed or frothed milk. A handheld frother, a French press pumped up and down, or a small saucepan whisked over low heat all produce usable foam. For a latte-style drink, use roughly one part moka coffee to two or three parts milk.
For iced drinks, pour the freshly brewed coffee over plenty of ice and add cold milk; the strong concentrate keeps its flavor even as the ice melts. Medium and medium-dark roasts usually work best with milk, because their chocolate and caramel notes come through clearly. The Bialetti Brikka, which uses a weighted valve to build a little more pressure, produces a lightly foamy top that some people like for milk drinks, though it is not true espresso crema.
Common Moka Pot Mistakes to Avoid
Most problems people have when learning how to use a moka pot come from a handful of mistakes that are easy to fix. Grinding too fine, often by using espresso grind, blocks flow and makes the coffee bitter. Tamping the basket does the same. Using high heat rushes the brew and scorches the coffee, and letting the pot run into the sputtering phase adds a harsh, thin finish to every cup. Overfilling the base so water covers the safety valve is unsafe and should always be avoided.
Other mistakes are about care rather than brewing. Leaving grounds on the rim stops the pot sealing properly, so it leaks and brews weakly. Washing an aluminum pot with harsh detergent or in the dishwasher can damage and discolor it. Storing the pot assembled while still damp traps moisture and encourages odors. And leaving brewed coffee sitting in the pot on a warm burner makes it taste stewed within a few minutes.
How to Clean a Moka Pot
Knowing how to use a moka pot includes knowing how to care for it. Let the pot cool completely after each brew, then unscrew it, knock out the coffee puck, and rinse every part with warm water. Most makers recommend avoiding detergent and the dishwasher for aluminum pots, because detergent strips the thin coffee-oil layer that protects the metal and can dull or pit the surface. Stainless steel pots tolerate mild soap. Dry the parts separately and store the pot unassembled so air can circulate.
Every few weeks, check the gasket and filter plate. Push out any grounds trapped behind the gasket and clear blocked holes in the filter plate. Replace the gasket when it hardens, cracks, or starts to leak, typically every several months to a year with regular use. If your water is hard, an occasional rinse with diluted vinegar or citric acid removes mineral deposits from the base. A new aluminum pot can taste metallic at first, so brew and discard two or three pots before drinking. For daily, weekly, and descaling routines in more detail, see our guide to how to clean a moka pot.
Choosing a Moka Pot
If you are buying your first pot, size it to how much you drink, since the basket must always be full. A three-cup pot makes one strong serving or a base for one milk drink; a six-cup pot suits two people. The Bialetti Moka Express is the classic aluminum design and the reference that most moka instructions, including these, are written around. It heats quickly and evenly but needs gentle cleaning and an adapter on induction. Our Bialetti Moka Express review covers it in depth.
Stainless steel pots such as the Bialetti Venus are more durable, easier to clean, and work on induction, though they heat a little differently and cost more. The Bialetti Brikka adds a pressure valve for a more concentrated cup with a light foam. Whichever you choose, a burr grinder will improve your results more than any upgrade to the pot itself. Our best moka pots guide compares more options.
Troubleshooting: Bitter, Sour, Weak, or Sputtering
Even when you know how to use a moka pot well, it has a narrower extraction window than drip or AeroPress, so small mistakes show up clearly in the cup. When something tastes off, work through the grind first, since it has the biggest effect, then heat and timing, then the hardware.
| Symptom | Most likely cause | Fix, in this order |
|---|---|---|
| Bitter and harsh | Grind too fine, heat too high, or brewed past the gurgle | Grind coarser, lower the heat, stop earlier |
| Sour and hollow | Grind too coarse, basket underfilled, or stale coffee | Grind finer, fill the basket fully, use fresher beans |
| Burnt or ashy | Very dark roast with high heat, or left on the burner | Lower the heat, remove promptly, try a medium roast |
| Both bitter and sour | Uneven grind from a blade grinder | Switch to a burr grinder |
| Sputters early | Grind too fine, coffee tamped, or heat too high | Grind coarser, never tamp, reduce heat |
| Metallic taste | New aluminum pot, dirty pot, or hard water | Brew a few seasoning pots, clean well, use filtered water |
| Leaks from the middle | Loose assembly or worn gasket | Tighten firmly, clean the rim, replace the gasket |
If the pot hisses steam from the safety valve, turn off the heat, let it cool completely before opening, and clean the filter plate; the grind was probably too fine or the basket was tamped. Our moka pot troubleshooting guide covers each problem in more depth.
Brew Better Moka Coffee
A classic pot and a consistent grinder cover the essentials.
As an Amazon Associate, CoffeeGearHub earns from qualifying purchases.
Editorial bottom line: Learning how to use a moka pot takes a few brews. Preheat the water, fill the basket fully with medium-fine coffee without tamping, brew on gentle heat with the lid open, and remove the pot as soon as the stream turns pale. Cool the base, stir, and serve right away. Adjust the grind one step at a time by taste, and keep the pot clean and the gasket fresh.
Frequently Asked Questions
How long does it take to brew coffee in a moka pot?
Usually four to eight minutes from placing the pot on the heat to removing it, depending on pot size and stove. A three-cup pot on medium-low heat with preheated water takes about four to five minutes.
How much coffee do I use in a moka pot?
Fill the basket fully and level it, which is roughly 15 to 18 grams for a three-cup pot and 28 to 32 grams for a six-cup pot. Never half-fill the basket; use a smaller pot for less coffee.
Should I use hot or cold water in a moka pot?
Hot water is usually better. Starting with water just off the boil shortens the time the coffee sits heating on the stove, which reduces bitterness. Use a towel when assembling the hot base.
Do I need to tamp coffee in a moka pot?
No. Fill the basket, level it with a finger, and wipe the rim. Tamping compacts the coffee, blocks flow, and raises pressure.
How do I know when moka pot coffee is done?
Remove the pot when the stream changes from dark brown to pale tan and the sound shifts from a gentle hiss to a gurgle. Coffee that comes out after that point tastes bitter and thin.
Can I use a moka pot on an induction stove?
Only stainless steel pots with a magnetic base, such as the Bialetti Venus or Moka Induction, work directly on induction. Classic aluminum pots need an induction adapter plate.
Sources and Further Reading
Brewing steps reference moka pot makers’ published instructions, including Bialetti’s, cited here as a plain-text source. Extraction and temperature concepts follow the Specialty Coffee Association’s brewing standards, and grind guidance draws on Baratza published information. CoffeeGearHub did not test these products in-house; recommendations draw on published information and owner and reviewer reports.
CoffeeGearHub product shortlist
Continue with related products on CoffeeGearHub
Review product categories and current verified merchant offers on CoffeeGearHub before leaving the site.