
Espresso Troubleshooting Guide
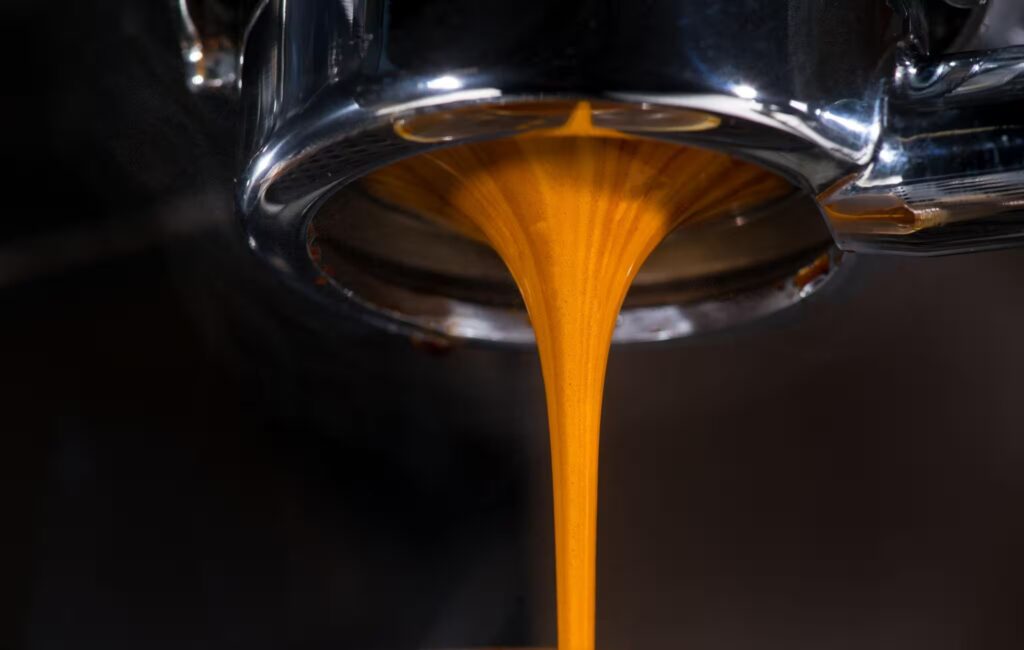
Editorial standards: this guide treats shot time, ratio, grind, temperature, and visible flow as diagnostic evidence rather than universal pass/fail rules. Recommendations are based on repeatability, basket and machine fit, coffee behavior, and taste.
At a glance
What this guide covers
Sour and bitter shots, fast and slow flow, channeling, inconsistent results, roast-level tendencies, water and cleanliness, grinder limits, puck preparation, and a repeatable troubleshooting order.
Editorial analysis
Diagnose the failure mode before changing the recipe
Espresso troubleshooting is faster when you first decide whether the problem is flow, puck preparation, recipe balance, or machine condition. A grind change is useful only when the rest of the system is stable enough for that change to mean something.
Keep most variables fixed, change one thing at a time, record the result, and use taste plus repeatability—not one number alone—to decide what comes next.
The 30-Second Answer
Diagnose espresso by separating flow, puck preparation, recipe, and machine condition. If a shot is clearly fast and thin and the rest of the workflow is stable, try a small finer-grind change. If it is clearly slow, harsh, or drying, a coarser adjustment may help. When identical settings produce different results, fix dose, distribution, tamp, retention, warm-up, or cleanliness before changing the recipe. Shot time and ratio are useful references—not universal pass/fail numbers.
Troubleshoot with measurements
Two inexpensive tools that improve diagnosis
A distribution tool can reduce puck-prep variability, while a scale makes dose and beverage yield measurable from shot to shot.
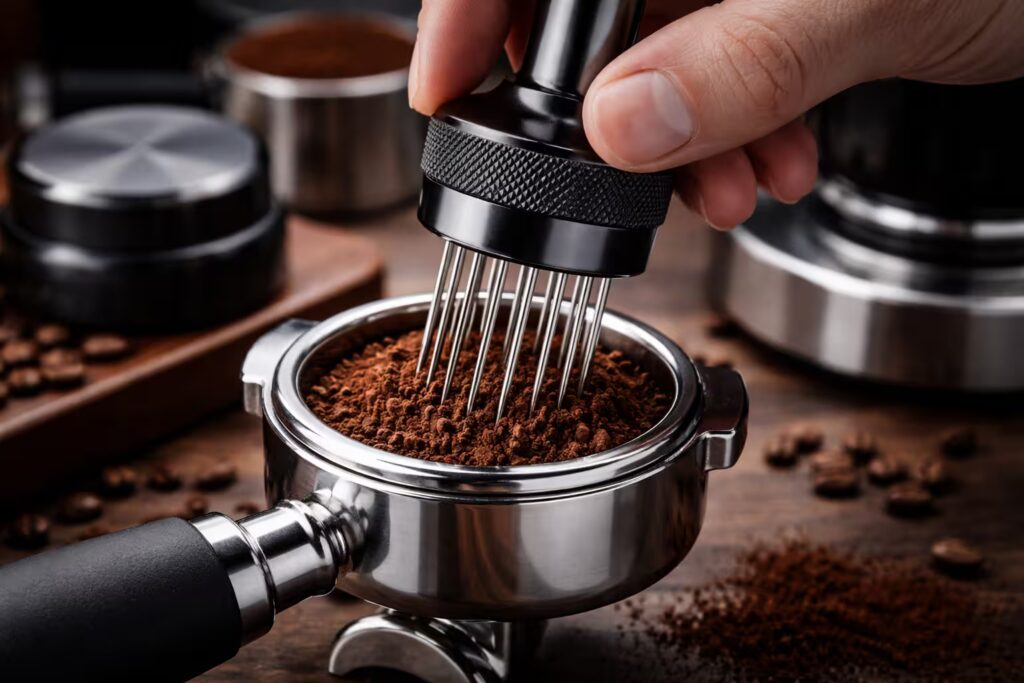 WDT Distribution ToolUseful for breaking up clumps and making distribution more repeatable before tamping.Check current Amazon offer →
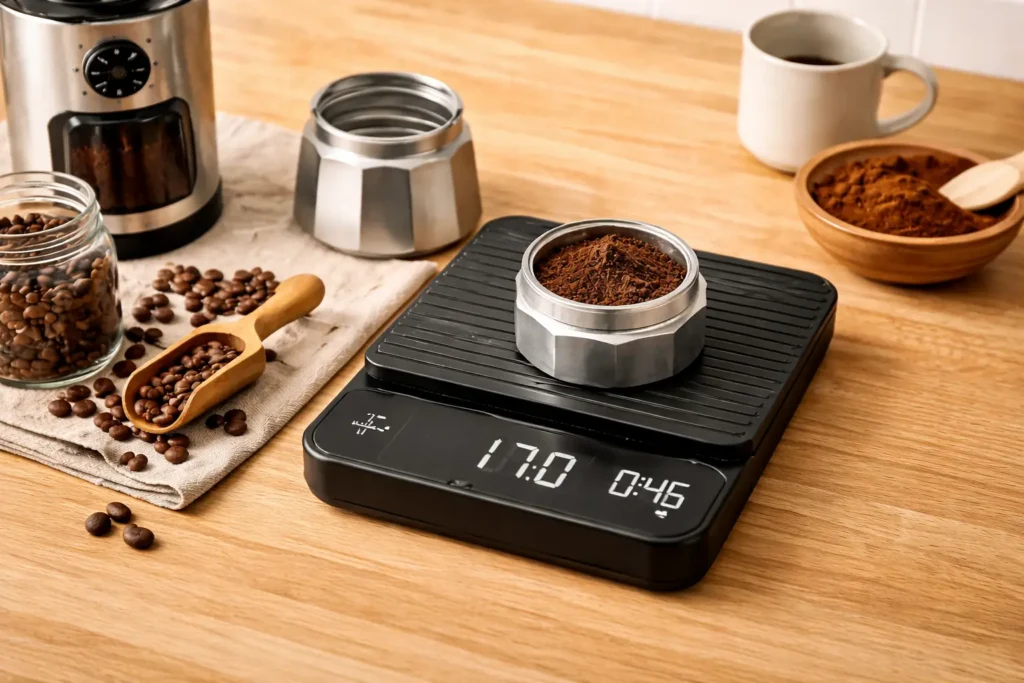 Precision Scale with TimerMakes dose, beverage yield, and shot-to-shot comparisons measurable instead of visual guesses.Check current Amazon offer →
Affiliate disclosure: Amazon links may earn CoffeeGearHub a commission at no additional cost to you. Prices and availability can change.
Extraction Science: Why Espresso Shots Go Wrong
Espresso extraction follows a fixed sequence. As water passes through the coffee puck at 9 bar of pressure, it dissolves different compound categories in a predictable order — and the timing of that extraction determines whether the shot tastes balanced, under-extracted, or over-extracted.
| Extraction phase | Compounds extracted | What it contributes | What it tastes like when dominant |
|---|---|---|---|
| Early (0–18% yield) | Acids, salts, lighter volatiles | Brightness, initial aroma, structure | Sharp sourness, lemon/vinegar, thin body — under-extraction |
| Middle (18–22% yield) | Sugars, Maillard compounds, body-producing solids | Sweetness, body, complexity, crema stability | Balanced — sweet, viscous, structured. This is the target zone. |
| Late (22%+ yield) | Bitter phenols, astringent tannins | Bitterness, drying mouthfeel, harshness | Dry, ashy, harsh — over-extraction |
The useful goal is not to force every shot into one universal extraction window. Use dose, beverage yield, flow behavior, shot time, and taste together. Grind changes alter puck resistance and flow, but uneven puck preparation, basket fill, temperature, coffee age, and machine condition can produce similar symptoms.
Baseline Parameters: Eliminate 80% of Variables First
Before troubleshooting, establish a repeatable baseline that fits your basket and machine. The numbers below are starting references, not pass/fail rules. Keep most variables stable so the next shot teaches you something.
| Parameter | Example starting reference | Why this number | When to change it |
|---|---|---|---|
| Dose | A basket-appropriate dose; 18g is common in many double baskets | Fills a 58mm double basket to correct headspace; enough coffee for a 1:2 yield at proper extraction | Only after grind and temperature are dialled — dose is a strength adjustment, not an extraction fix |
| Yield (target) | About 1:2 when you need a neutral baseline | The specialty coffee standard for a balanced double espresso | Extend to 38–40g if sour after grind adjustment; reduce to 32–34g if bitter after grind adjustment |
| Shot time | Use time as a diagnostic, not a pass/fail target | The time range for correct extraction at 1:2 with a well-prepared puck — a diagnostic signal, not a target to hit by stopping the pump | Not adjusted directly — flows from grind adjustment |
| Temperature | 91°C (medium roast) | SCA-aligned starting point for medium roast espresso; light roasts need 93–96°C; dark roasts 88–91°C | After grind is in timing window — raise 1°C for sourness in window; lower 1°C for bitterness in window |
| Pump pressure | 9 bar | Industry standard; not adjustable on most home machines | Not adjustable on most home machines; some prosumer machines allow pressure profiling |
⚠️ Shot time is a consequence, not a target. Stop the pump when your scale reads 36g — not when the timer hits 30 seconds. A fast-flowing shot that reaches 36g in 18 seconds is under-extracted regardless of when you stop it. The weight tells you the ratio; the time tells you how fast the extraction happened. Both signals matter; weight is the primary one.
Quick Diagnosis Matrix: Symptom → Cause → Fix
Identify your symptom in the first column. Read the most likely cause and the first fix to try. Apply one fix per shot. Do not move to a secondary fix until you have confirmed the first one did not resolve the problem.
| What you notice | What it usually means | Most likely cause | First fix |
|---|---|---|---|
| Sharp sour / lemon, thin body, shot finishes under 20 seconds | Under-extraction | Grind too coarse; puck resistance too low | Grind 2 steps finer; keep dose and yield the same |
| Ashy bitter, dry mouthfeel, shot stalls or runs over 40 seconds | Over-extraction | Grind too fine; puck resistance too high | Grind 2 steps coarser; keep dose and yield the same |
| Sour AND bitter together; streams uneven or spraying | Channeling | Uneven puck prep — clumps, tilted tamp, uneven distribution | WDT before tamping + level tamp; do not change grind until channeling is resolved |
| Watery, weak, pale crema, bland taste | Under-extraction + low strength | Under-dose; or grind too coarse at correct dose | Confirm dose is 18g; then grind finer |
| Shot runs fast even at the finest grinder setting | Grinder cannot reach espresso-fine; or severe channeling | Grinder not espresso-capable; or non-pressurised basket with insufficient grinder | Check portafilter type; confirm dose; improve puck prep; consider grinder upgrade |
| Shot times vary significantly pull to pull at same setting | Grinder retention / stale grounds contaminating dose | Old retained grounds in chute changing effective grind each pull | Purge 2–3g before each session; weigh every dose; confirm grind setting is unchanged |
| Good shot time but sour — in timing window | Temperature too low for roast; or beans too fresh | Light roast at entry machine temp; or beans under 7 days post-roast | Raise temperature 1°C; rest beans to 7–10 days off roast; extend yield to 38–40g |
| Good shot time but bitter — in timing window | Temperature too high; or stale beans; or dark roast at standard parameters | Machine running hot; or 40+ day beans | Lower temperature 1°C; check roast date; for dark roast target 88–91°C and 22–26 second range |
| Pale, thin crema that disappears in seconds | Stale beans or grind too coarse | CO2 depleted from old beans; or under-extraction | Check roast date — use beans 7–21 days post-roast; if fresh, grind finer |
| Very dark, almost black crema with bitter taste | Over-extraction | Grind too fine; or temperature too high | Grind coarser; if in timing window, lower temperature 1°C |
| Shot quality has declined over weeks at same settings | Machine scale buildup reducing temperature; or grinder burr wear | Scale on heating element; rancid oil on burrs | Descale machine; clean grinder burrs; re-dial after cleaning |
Variable Hierarchy: What to Adjust and When
Match the first adjustment to the symptom and to what is already controlled. If dose, target yield, puck preparation, and machine routine are stable, grind is usually the cleanest way to correct an obvious flow problem. If shot-to-shot consistency is poor, fix that first.
| If your shot is… | Change this first | Then consider | Do not change |
|---|---|---|---|
| Too fast (under 20s) and sour | Grind finer — 2 steps | Extend yield to 38g if still slightly sour after grind adjustment | Do not raise temperature or increase dose until grind is in window |
| Too slow (over 40s) and bitter | Grind coarser — 2 steps | Reduce yield to 32–34g if bitter persists in window | Do not lower temperature until grind is in window |
| Sour AND bitter — any timing | Puck preparation — WDT + level tamp | Then grind finer after channeling is fixed; then ratio | Do not change grind until channeling is ruled out |
| In timing window but sour | Raise temperature 1°C | Extend yield to 38g; confirm beans are 7+ days off roast | Do not change grind — you are already in timing window |
| In timing window but bitter | Lower temperature 1°C | Reduce yield to 32g; check roast date | Do not change grind — you are already in timing window |
| Correct timing and taste but too weak/intense | Adjust dose ±0.5g or yield ±3g | Minor grind tweak to compensate for puck resistance change | Do not change grind to fix strength — grind fixes extraction quality, not strength |
Sour Espresso: Under-Extraction — The Complete Fix
Sour espresso is the most common problem for home baristas — particularly with light to medium roasts on entry machines. Most of the time, the cause is straightforward: the shot is not extracting far enough into the sweetness phase before the water has passed through the puck. The fix is almost always a finer grind.
How under-extracted shots taste and look
- Sharp lemon or vinegar sourness — not pleasant fruit acidity but aggressive sharpness
- Thin, watery body with no viscosity
- Salty or metallic edge
- Short, hollow finish that disappears immediately
- Pale, blond crema that collapses quickly
- Shot reaches 36g yield in under 20 seconds
Step-by-step fix — in the correct order
- If the shot is clearly fast and thin and dose, yield target, and puck preparation are stable, move slightly finer. Re-pull the same recipe and record flow and taste before making another change.
- Once in the 25–30 second window: taste again. If sourness persists despite correct timing, raise brew temperature by 1°C and re-pull at the same grind setting.
- If still slightly sour in timing window: extend yield to 38–40g (1:2.2–1:2.3 ratio), keeping grind and dose the same. More yield extracts slightly more of the sweetness phase.
- Check bean freshness: beans under 7 days off-roast retain high CO2 that creates resistance inconsistency and gassy, sharp flavours. Rest beans to 7–10 days before pulling dial-in shots.
- If using a light roast: light roasts require higher temperature (93–96°C) and often benefit from a longer ratio (1:2.5 to 1:3) to fully extract their sweetness phase. Most entry machines cannot reliably reach 93°C — this is a machine limitation, not a recipe problem.
Practical sequence: when a shot is clearly fast and thin and your dose, yield target, and puck preparation are repeatable, try a small finer-grind adjustment. Re-pull the same recipe, record the result, and use taste—not a single time target—to decide the next step.
Bitter Espresso: Over-Extraction — The Complete Fix
Some bitterness in espresso is normal and desirable — a controlled bitterness in the background is part of what makes espresso taste like espresso rather than coffee. The problem is when bitterness becomes dry, harsh, or ashy and overwhelms every other flavour. This is over-extraction — the shot has pushed past the sweetness phase into the harsh bitter compound zone.
How over-extracted shots taste and look
- Aggressive, mouth-drying bitterness — puckering the back of the palate
- Ashy, burnt, or hollow character with no sweetness
- Slow, labouring flow — or complete choking of the machine
- Shot takes over 40 seconds to reach 36g yield
- Very dark, almost black crema that lingers heavily
Step-by-step fix — in the correct order
- If the shot is clearly slow, harsh, or drying and the basket is not overdosed or blocked, move slightly coarser. Keep the rest of the recipe stable and compare the next shot.
- If the machine choked: grind 4–5 steps coarser immediately. Do not force repeated choked shots through the machine — this strains the pump and gives no useful diagnostic data.
- Once in the 25–30 second window: taste. If bitterness persists despite correct timing, lower brew temperature by 1°C and re-pull at the same grind setting.
- If still slightly bitter in timing window: reduce yield to 32–34g (1:1.8–1:1.9 ratio). A slightly shorter yield stops extraction before the bitter phase becomes dominant.
- Check cleanliness: rancid coffee oil on group head, shower screen, and portafilter basket creates a background bitterness that persists regardless of grind or temperature. Clean all components before concluding a recipe problem is the cause.
Channeling: Why Your Shot Tastes Sour and Bitter at Once
Channeling is a common source of confusing espresso results because one part of the puck can extract differently from another. Sourness and bitterness together can be consistent with uneven extraction, especially when a bottomless portafilter shows spraying or asymmetric flow, but taste alone does not prove channeling. Confirm with repeatability and visible flow before changing the recipe.
Signs of channeling
- Sourness and bitterness in the same shot can be consistent with uneven extraction, especially when flow is visibly irregular.
- Spraying, jets, or asymmetric streams visible from a bottomless portafilter
- Early blonding (shot turns pale yellow) before the target yield is reached
- Shot runs fast despite what feels like a fine grind setting
- Two consecutive shots at the same setting taste completely different
Fix channeling before changing any recipe variable
- Use WDT — stir the grounds with thin wire needles after grinding into the basket (or dosing cup). This breaks up clumps and homogenises ground density across the basket surface, eliminating the dense/sparse zones that create channels when water pressure is applied.
- Distribute before tamping — after WDT, tap the portafilter lightly on a flat surface and use a finger sweep to level the surface before tamping. The goal is a uniform bed depth across the entire basket.
- Tamp level — place the portafilter on a flat surface, keep your wrist straight and elbow at 90°, and apply pressure straight down. A tilted tamp creates a thick side and a thin side in the puck; water finds the thin side every time. Calibrate your pressure once on a scale — target 15–20kg.
- Keep the basket and shower screen clean — dried grounds residue on the shower screen creates uneven pre-wetting of the puck surface that initiates channels before extraction even begins.
Inconsistent Shots: Why Every Pull Tastes Different
Shot-to-shot inconsistency — where two pulls at the same grind setting and dose produce dramatically different timing and taste — is one of the most frustrating espresso problems because it makes dial-in feel impossible. If you cannot produce a consistent result from the same inputs, you cannot tell whether a change improved or worsened the shot. Inconsistency almost always has one of four causes, each with a specific fix.
| Inconsistency cause | How to identify it | Fix |
|---|---|---|
| Dose weight varying between shots | You are using a volume scoop or timer-only dosing without weighing each dose individually | Weigh every single dose on a scale accurate to 0.1g. A 1g variation at 18g changes shot timing by 3–5 seconds — enough to make two shots look like completely different grind settings. |
| Grinder retention contaminating each dose | First shot of the day tastes different from the second; first shot after a grind setting change still tastes like the old setting | Purge 2–3g of beans at the start of each session before grinding your dose. Retained stale grounds from the previous session mix with the fresh dose and change the effective grind every pull. |
| Inconsistent puck preparation | Shots are timed differently but dose weight is consistent | Standardise your preparation exactly — same number of WDT rotations, same tamp pressure, same level check every time. Inconsistent prep produces inconsistent puck resistance even with a perfect grind setting. |
| Machine not fully warmed up | First shot of the day is always different from subsequent shots | Allow at least 20 minutes warm-up time before pulling dial-in shots. Cold group heads act as a heat sink and drop brew temperature by several degrees on the first pull. Run a blank flush shot before the first coffee shot each session. |
Roast-Level Specific Problems
Different roast levels have different densities, solubilities, and compound profiles — meaning a recipe that produces a balanced medium roast shot produces an under-extracted light roast and an over-extracted dark roast from the same machine and grinder. Use this reference when switching roast levels.
| Roast level | Most common problem | Reason | Specific fix |
|---|---|---|---|
| Light roast ☀️ | Persistently sour despite finer grind | Light roasts are dense and less soluble — they need more thermal energy to extract the sweetness phase. Most entry machines cannot reach the 93–96°C required. | Raise temperature to maximum machine capability; target 1:2.5–1:3 ratio (longer yield); grind significantly finer than medium roast equivalent; extend pre-infusion if available |
| Medium roast 🌤 | Usually the most forgiving — sourness or bitterness from standard dial-in causes | Balanced solubility — standard parameters apply | Follow the standard sour or bitter fix sequences above; start at 91°C |
| Medium-dark roast | Tips into bitterness easily | More soluble than medium — extracts bitter compounds faster | Target 89–91°C; use slightly coarser grind than medium equivalent; consider 1:1.8–1:2 ratio |
| Dark roast 🌑 | Harsh bitterness and/or hollow flat shots | Highly porous and soluble; bitter compounds extract very rapidly; many dark roasts are designed to mask sourness with bitterness | Target 88–90°C; grind coarser than standard; use 1:1.5–1:1.8 ratio; if still harsh: the beans may simply be too dark for balanced espresso extraction |
| Very fresh beans (under 7 days) | Gassy, sharp, hard to extract evenly | High CO2 retention creates resistance inconsistency — water finds different paths each pull | Rest beans to at least 7 days post-roast before dial-in; medium and dark roasts can be used at 5–7 days; light roasts often need 10–14 days |
| Old beans (40+ days post-roast) | Flat, hollow, no sweetness or aroma despite correct parameters | Aromatic volatiles depleted; staling has progressed beyond the point where any extraction technique recovers flavour | Buy fresh roast-dated beans; no recipe or technique adjustment recovers flavour from stale beans |
Hidden Variables: Water Quality and Machine Cleanliness
If espresso remains difficult to dial in after the recipe and puck preparation are repeatable, check water and machine condition. Water composition affects extraction and taste, while scale, coffee oils, and blocked dispersion paths can alter flow and temperature. Follow the machine maker’s water and descaling guidance rather than relying on one universal mineral target.
Water Quality
Water is 98% of espresso. Water chemistry affects both the extraction process and your perception of the finished cup.
- Too soft (under 50ppm TDS): tastes flat and lifeless; under-extracts despite correct parameters; no mineral ions to facilitate extraction
- Too hard (over 200ppm TDS): emphasises harshness and bitterness; deposits scale on heating element reducing temperature over time
- High chlorine: off-flavour that masks espresso sweetness and produces a chemical edge in the cup
- Fix: use filtered tap water (Brita or similar) as a baseline — removes chlorine and reduces scale-forming minerals while retaining extraction-facilitating mineral content
Machine Cleanliness
Rancid coffee oil on machine components produces a persistent, untraceable bitterness that no recipe adjustment can fix.
- Group head and shower screen: rinse after every session; dried grounds residue on the screen creates uneven pre-infusion
- Portafilter basket: soak weekly in hot water; oil builds up on the basket holes and restricts flow unevenly
- Steam wand: purge and wipe immediately after every use — milk residue dries within minutes and is very difficult to remove after hardening
- Descaling: every 1–3 months depending on water hardness — scale on the heating element reduces brew temperature silently over time
Gear: The Upgrades That Actually Fix Espresso Problems
Equipment problems produce equipment solutions — but not all equipment upgrades address the same problem category. Use this hierarchy to direct spending toward the upgrade that fixes your specific issue, rather than buying equipment that addresses problems you do not have.
| Tool / upgrade | Impact on consistency | Problem it fixes | When to buy |
|---|---|---|---|
| Dedicated espresso grinder | 🔴 Highest | Inconsistent extraction; shots that cannot be dialled in; fast shots at “fine” settings | If dial-in feels impossible or shot times vary wildly at the same grinder setting |
| 0.1g scale with timer | 🔴 Very high | Dose inconsistency; yield inconsistency; inability to compare shots | Immediately — this is non-negotiable for any systematic dial-in |
| WDT distribution tool | 🟠 High | Channeling; simultaneous sour + bitter; fast shots despite fine grind | Immediately after the scale — the highest-impact low-cost accessory in espresso |
| Bottomless portafilter | 🟡 Medium (diagnostic) | Makes channeling visible; accelerates puck prep diagnosis | If you want faster visual feedback on preparation quality |
| Calibrated level tamper | 🟡 Medium | Tilted tamp causing channeling; inconsistent tamp pressure | If tamping feels physically inconsistent between shots |
| Thermometer / PID-equipped machine | 🟡 Medium | Temperature-related sourness or bitterness in timing window; light roast under-extraction | If shots are in timing window but taste problems persist after grind and puck prep are resolved |
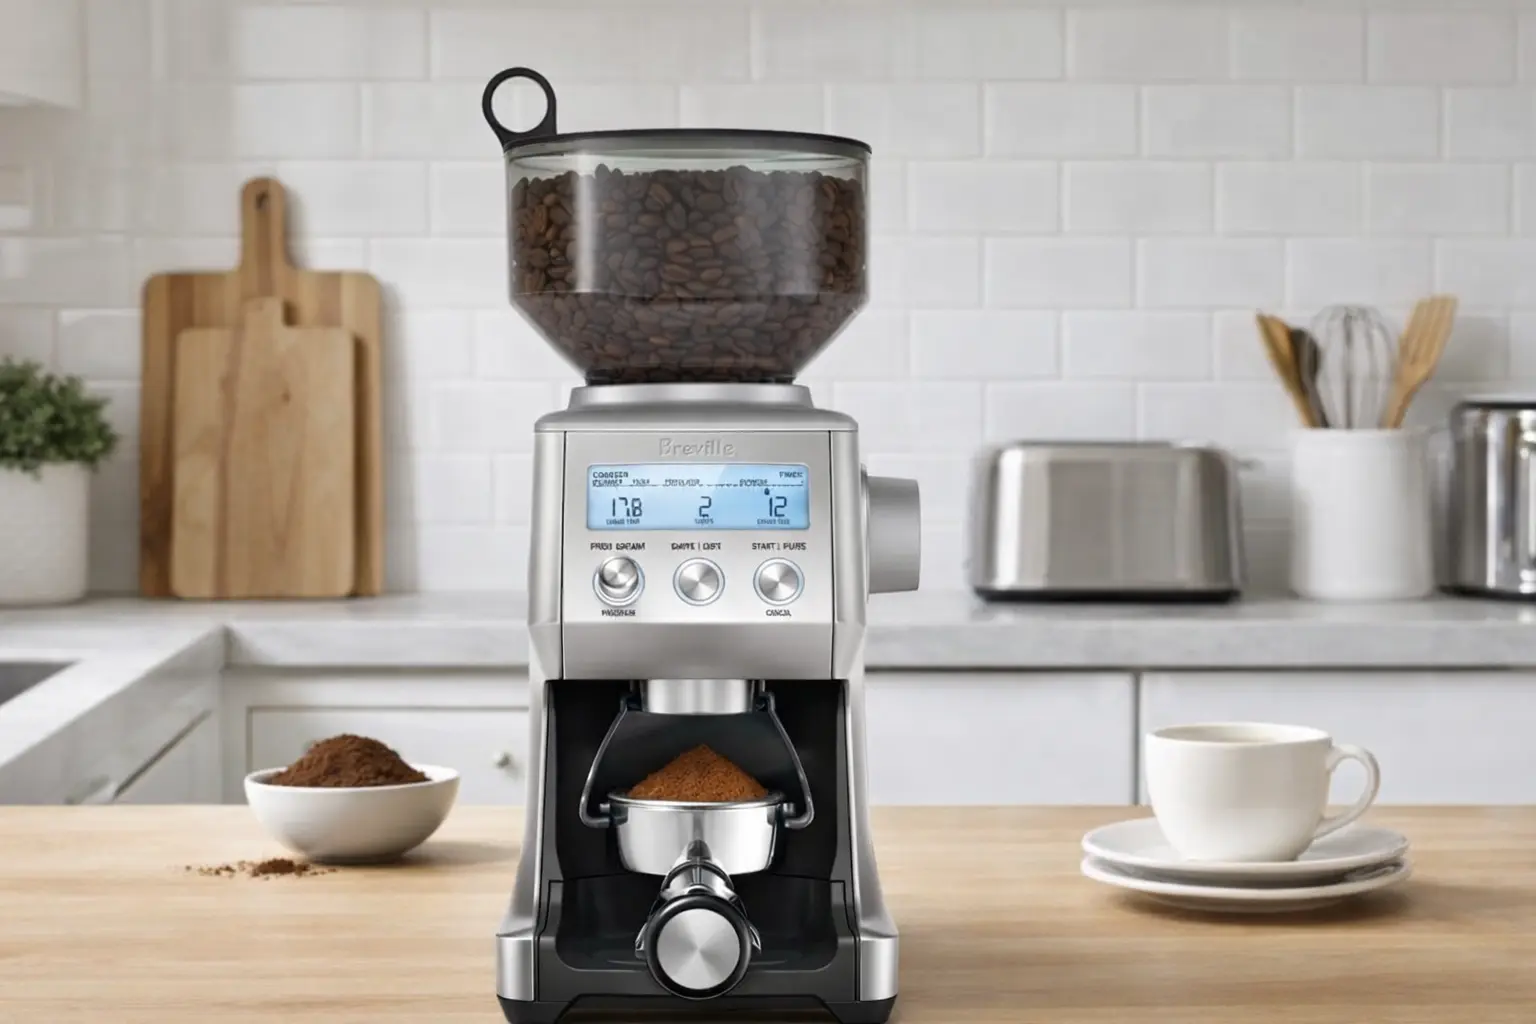
Espresso grinder example
Breville Smart Grinder Pro
A stepped grinder option with a broad adjustment range. Treat it as an equipment example, not a guarantee that one setting will suit every basket or coffee.
Check current Amazon offer →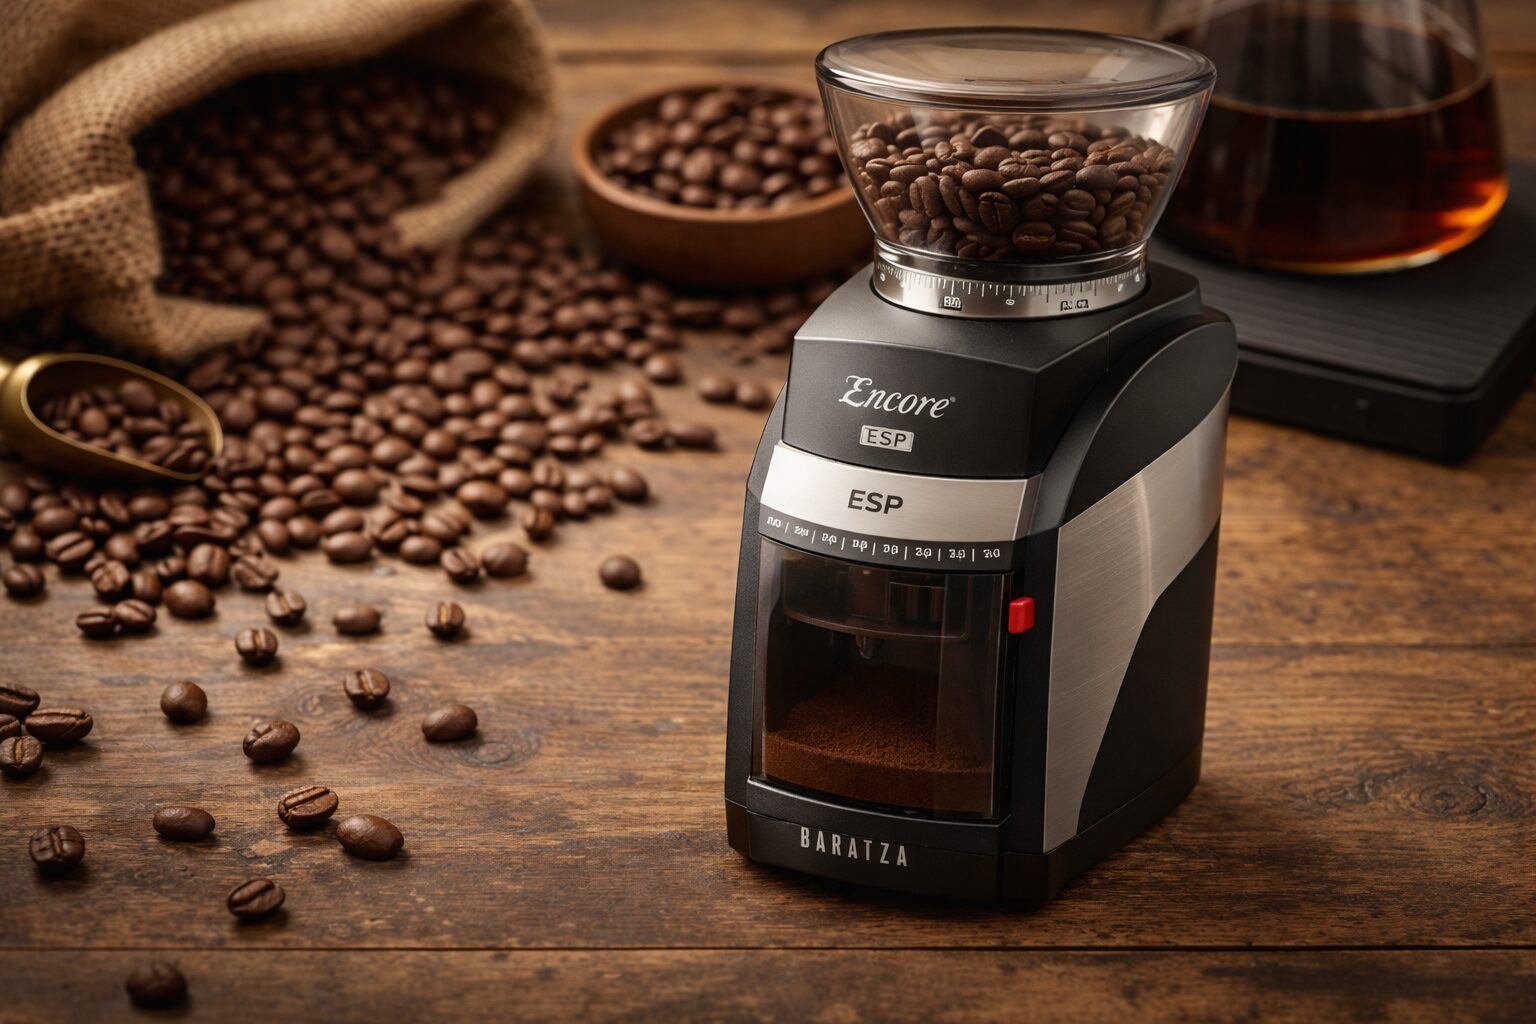
Espresso-focused grinder
Baratza Encore ESP
A grinder with a dedicated higher-resolution espresso range. Useful when the current grinder cannot make small enough flow corrections.
Check current Amazon offer →Full Espresso Troubleshooting Guide Matrix: Every Common Espresso Problem
The complete reference matrix. Identify your symptom, check the most likely cause, apply fixes in order. Change one variable per shot.
| What you notice | Check first | Useful next test |
|---|---|---|
| Shot reaches target yield very quickly and tastes thin or sharp | Dose, puck damage, grinder setting | Verify dose and prep; if stable, try a small finer-grind adjustment |
| Shot reaches target yield very slowly and tastes harsh or drying | Basket overfill, blockage, grinder setting | Check basket fill and cleanliness; if stable, try slightly coarser |
| Sour and bitter notes appear together | Uneven extraction, roast character, recipe balance | Inspect distribution and visible flow before changing multiple recipe variables |
| Shot time varies widely at the same setting | Dose, distribution, tamp, retention, warm-up | Standardize workflow before changing the recipe |
| Flow is repeatable but the cup is still sharp | Yield, temperature, coffee, water | Change one variable at a time; a slightly longer yield or higher temperature may help some coffees |
| Flow is repeatable but the cup is harsh or drying | Yield, temperature, roast, cleanliness | Try a shorter yield or lower temperature if appropriate for the coffee; verify equipment is clean |
| Pump runs with little or no flow | Overdosing, overly fine grind, blocked basket/group | Stop the shot, check basket fill and cleanliness, then adjust grind if needed |
| Recipe drifts through the same bag | Coffee aging, humidity, grinder retention | Expect small grind changes over time and record the new successful setting |
| Cup tastes flat or hollow | Coffee age, water, roast character | Check roast information and water before assuming a grinder or machine fault |
| Quality declines over several weeks | Cleaning, scale, burr condition | Perform manufacturer-recommended maintenance, then re-establish the baseline recipe |
Final Takeaway: The Master Troubleshooting Workflow
Espresso troubleshooting is most reliable when you establish a repeatable baseline, identify which part of the system is unstable, and change one variable at a time. Use grind to correct obvious flow problems only when dose, target yield, puck preparation, and machine routine are already controlled. Use yield and temperature to refine taste, and treat shot time as evidence rather than a universal target. Record successful recipes so the next adjustment starts from a known baseline.
FAQs: Espresso Troubleshooting
Why is my espresso sour even at 30 seconds?
Why does my espresso taste both sour and bitter?
Do I have to hit 30 seconds exactly?
What is the single most impactful upgrade for better espresso?
Should I change grind size or ratio first?
What is a good starting espresso ratio?
Do I need a bottomless portafilter to diagnose channeling?
How fresh should espresso beans be?
Can water quality affect espresso taste?
Why is my shot fast even when the grind feels fine?
CoffeeGearHub shortlist
Measure, diagnose, then adjust
Use these CoffeeGearHub pages for the core tools and technique behind repeatable espresso troubleshooting.
Continue Learning
In this guide
- The 30-Second Answer
- Extraction Science: Why Espresso Shots Go Wrong
- Baseline Parameters: Eliminate 80% of Variables First
- Quick Diagnosis Matrix: Symptom → Cause → Fix
- Variable Hierarchy: What to Adjust and When
- Sour Espresso: Under-Extraction — The Complete Fix
- Bitter Espresso: Over-Extraction — The Complete Fix
- Channeling: Why Your Shot Tastes Sour and Bitter at Once
- Inconsistent Shots: Why Every Pull Tastes Different
- Roast-Level Specific Problems
- Hidden Variables: Water Quality and Machine Cleanliness
- Gear: The Upgrades That Actually Fix Espresso Problems
- Full Espresso Troubleshooting Guide Matrix: Every Common Espresso Problem
- Final Takeaway: The Master Troubleshooting Workflow
- FAQs: Espresso Troubleshooting
- Continue Learning